An Escalation Distribution List is a defined escalation workflow that is created in the VMP Server. It consists of one or more branches of groups or users.
When a message is sent to the list, it is sent to the first branch. If no one in the first branch responds in the specified time, the message is escalated to the next branch, and then to additional branches if necessary.
You can send a message to any Escalation Distribution List that you have permission to view. This message is sent as a notification.
-
In the Secure Messages screen, tap
 .
If message templates have
been created for your environment, the New Text screen appears.
.
If message templates have
been created for your environment, the New Text screen appears.
 Note: To skip the New Text screen, tap and hold.
-
Tap the name of the message template that you want to use, or tap New Text to create a new message without a template.
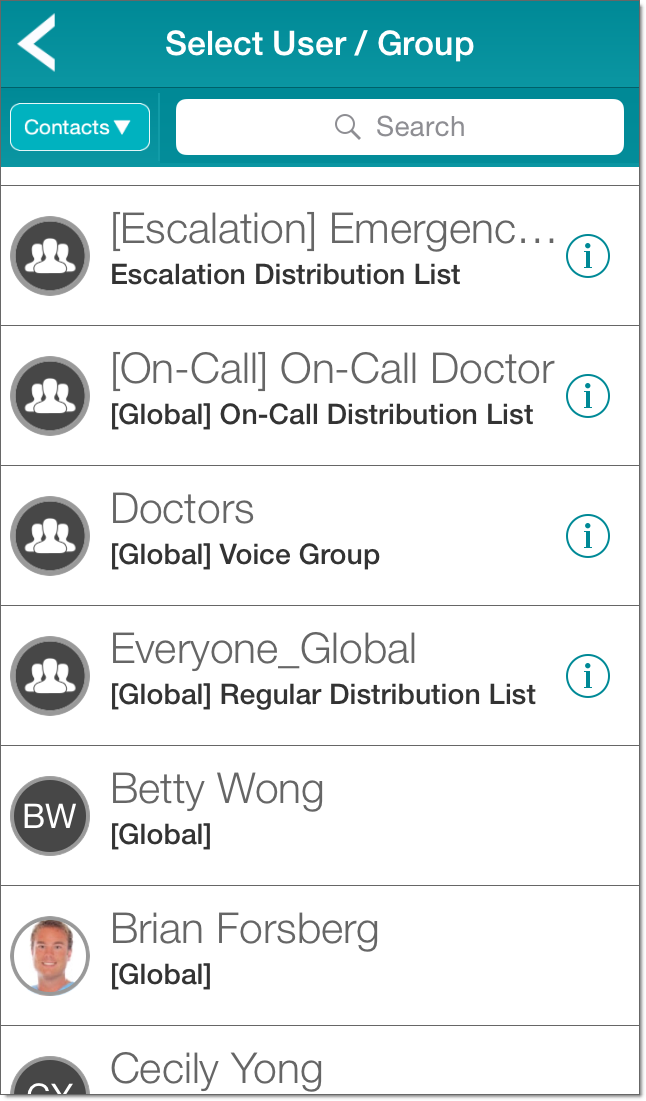
The Select User / Group screen appears.
Note: This is the screen that appears if no message templates have been created for your environment.
If you use a template, some or all of the information that you are asked to provide in the following steps may already be specified for you.
-
From your Favorites or from your list of Contacts, select the Escalation Distribution List to which
you want to send the message. The New Secure Text screen appears.
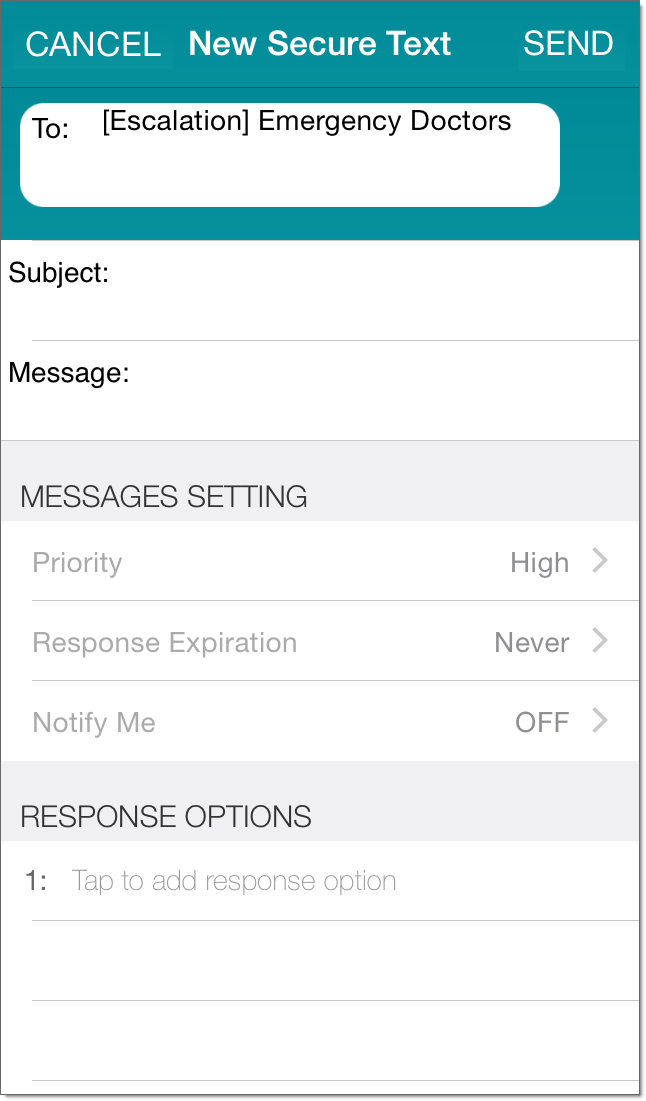 Note: Vocera recommends sending a message to one Escalation Distribution List only.
 -
Tap in the Response Options section to add a response option, and then type the text of the
response option. Repeat until all of the response options that you want to specify have been added. To remove a response
option that you have added, tap
 .
Note: If you are sending a message to a Vocera badge, response options can be a maximum of 15 characters.
.
Note: If you are sending a message to a Vocera badge, response options can be a maximum of 15 characters.
In the Secure Messages screen, notifications sent to Escalation Distribution Lists are tagged with the
![]() icon.
icon.

While the server is processing the message, the recipients field is set to Escalation in Progress. If no recipients are available after all branches of the Escalation Distribution List have been processed, the recipients field is set to No Recipients Available.
A recipient is considered unavailable if his or her messages are being forwarded to a contact who is unavailable.