When you create groups interactively in the Administration Console, you can add members and specify permissions at the time you create the group. However, you can create only one group at a time.
To create a group in the Administration Console:
-
If you are not on the Update Organization page, navigate to it by selecting
Admin > Edit Organization from the menu at the top right of any page.
The Update Organization page appears.

-
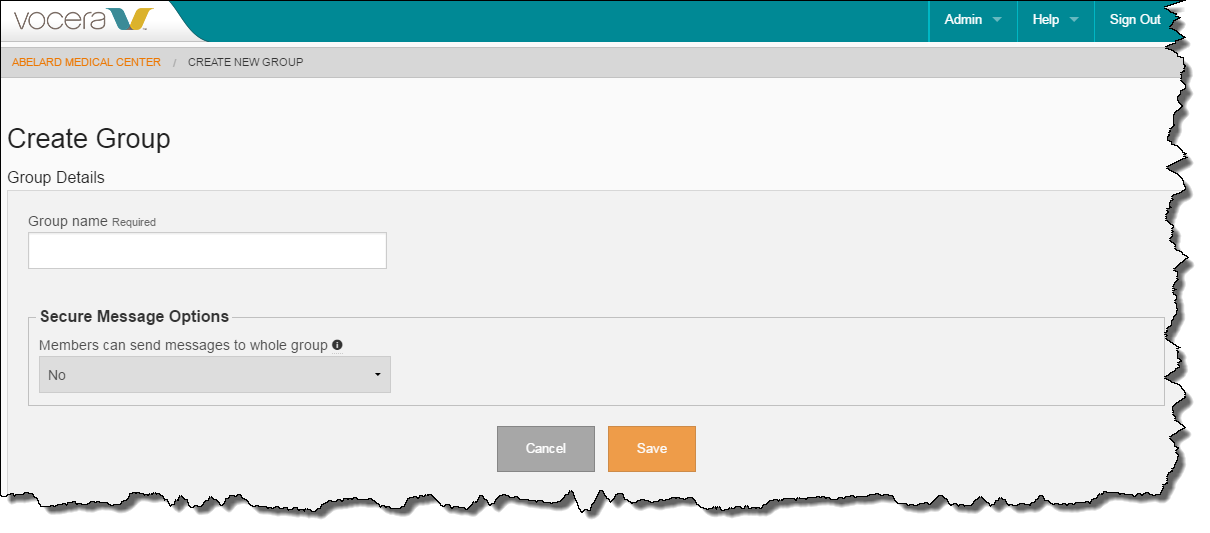
In the Sub groups section,
click Create New Group.
The Create Group page appears.
-
Enter the group details as described in Create Group Page Reference
and click Save.
The group is created and the Update Group page appears.
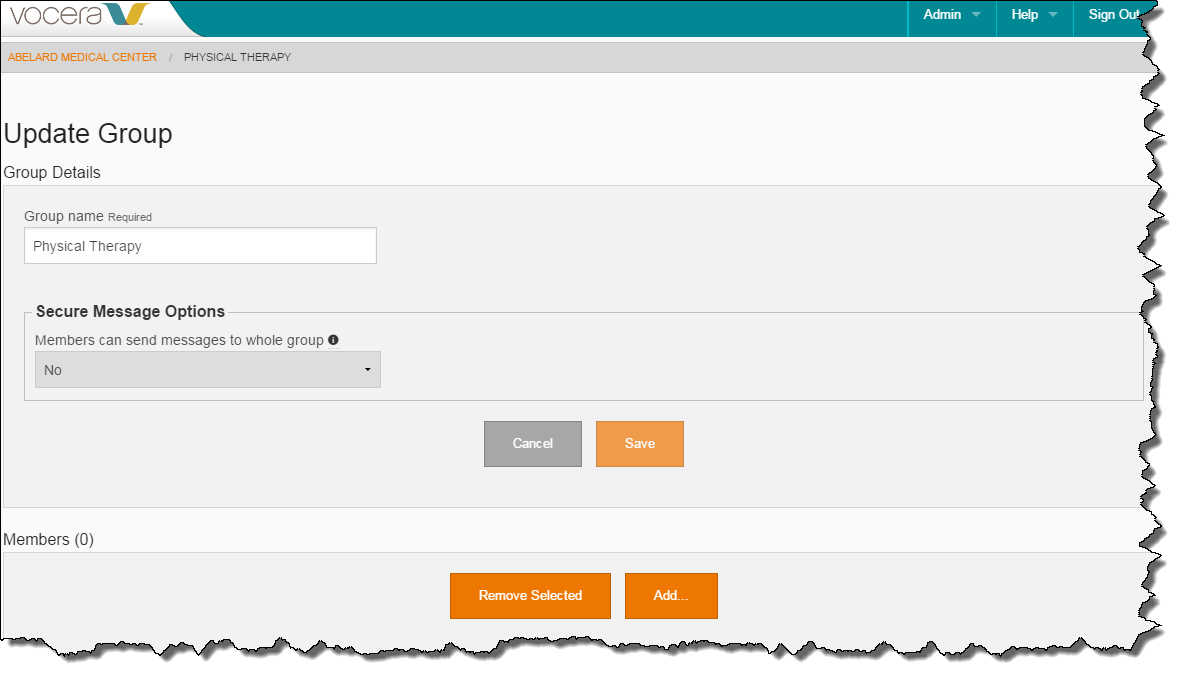
After you create a group, click the Add button and update its membership as described in
How to Manage Membership in a Group. You can also set permissions to restrict communication with other
organizations. See How to Limit Communication with an Affiliate.