Vocera devices have labels on the back that include barcodes for the serial number and MAC address of the device.
An inventory sheet with barcodes of the badges' serial numbers is included with every Vocera badge pack. You can use a handheld barcode scanner to scan the badge labels or the inventory sheets. When you scan a Vocera device barcode label using a scanner with keyboard emulation, the data scanned appears at the cursor as if you had typed it from the keyboard. This helps you avoid typographical errors in entering serial numbers and MAC addresses.
When you receive a shipment of badges from Vocera, it is much easier to scan barcodes for badge serial numbers from the inventory sheet that accompanies the Vocera badge pack. The inventory sheet includes barcodes for the serial numbers of all badges packed in the box.
The following figure shows a user scanning barcodes from a Vocera inventory sheet.


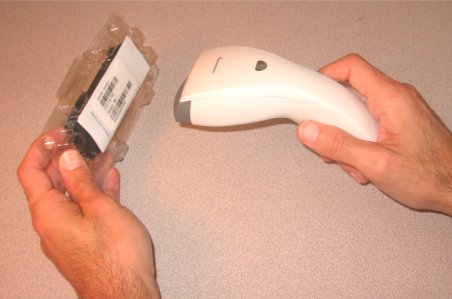
Individual badges are shipped in a plastic clamshell that also has barcode labels. Before opening the clamshell, you can scan the barcodes of the MAC address and serial number from the back of the clamshell.
The following figure shows a user scanning barcodes from the back of a badge clamshell.

The following figure shows a user scanning the barcode label on the back of a Vocera badge.
To add devices into the system using a barcode scanner:
-
Make sure your scanner is capable of reading and scanning Code 128 barcodes. See Barcode Scanner Requirements.
-
Obtain either the devices or inventory sheets for the devices you need to scan.
-
Log in to the Administration Console.
-
Click Devices in the navigation bar.
-
Click Add New Device. The Add/Edit Device dialog box opens.
-
Enter common values in the Add/Edit Device dialog box that are shared between all devices you are scanning.
-
If the devices share the same Tracking Date, Owner, and Site, specify values for those fields. Otherwise, leave them blank for now and fill them in later.
-
If you are assigning the devices to a group, change the status from "Unregistered" to "Inventory" or "Active."
-
If the devices are shared by multiple users in the group, make sure to check the Shared Device? box.
Important: These values will be used for all of the devices that you scan during the session. -
-
Click the Serial Number field.
-
Using the scanner, scan the serial number from the device or the inventory sheet.
Important: If you are scanning badge serial numbers, the MAC Address field is automatically populated, its value derived from the serial number. -
Once the Serial Number and MAC Address fields are completed, the device is saved automatically after a brief pause. The Add/Edit Device dialog box remains open and the Serial Number and MAC Address fields are cleared so that you can add another device.
To search for a device using a barcode scanner:
-
Log in to the Administration Console.
-
Click Devices in the navigation bar.
-
Click the Search By field, and select either "Serial No" or "MAC Address."
-
With the cursor in the Search field, use the scanner to scan the serial number or MAC address label from the device.
-
The matching device is selected in the Devices list. To edit it, click Edit Device.