Assignments that are visible in the logs should also be visible in the CTS database. If assignments appear in the logs but not in the CTS database, make sure that the user ID is mapped correctly between the source and target systems. This topic shows you how to confirm that expected assignments appear in the database.
To confirm assignments in the CTS database:
-
On the CTS machine, use the
Windows interface to launch MySQL Workbench. If prompted, log into the root account with the
password vocera.
The MySQL Workbench user interface appears.
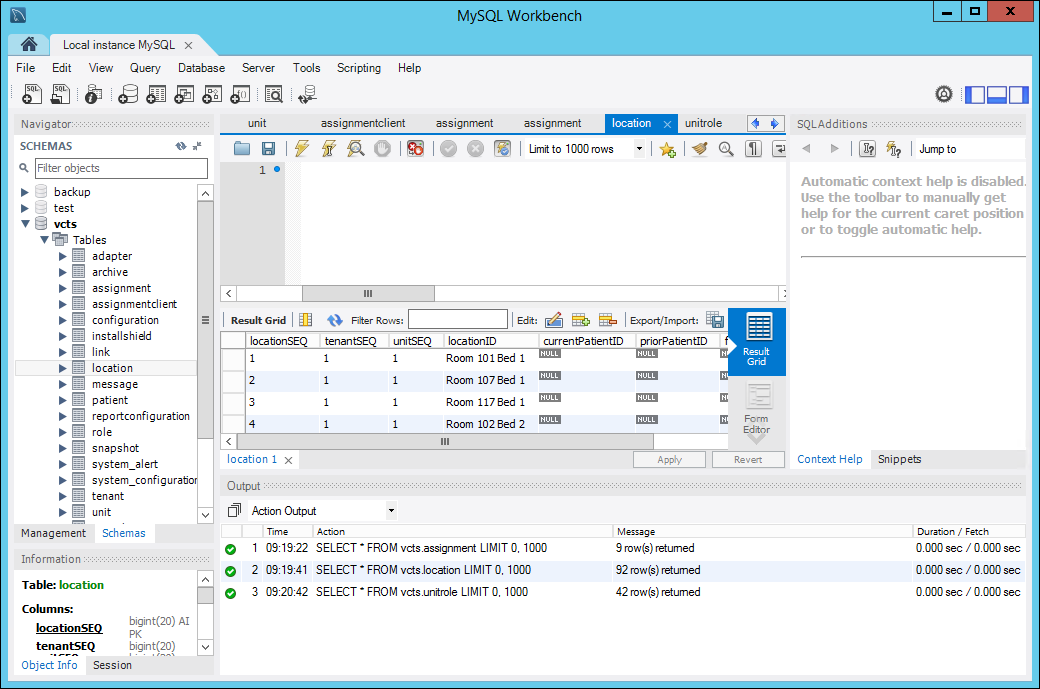
-
Right-click the location table and choose Select Rows - Limit 1000.
A grid showing values in the rows and columns of the location table appears.
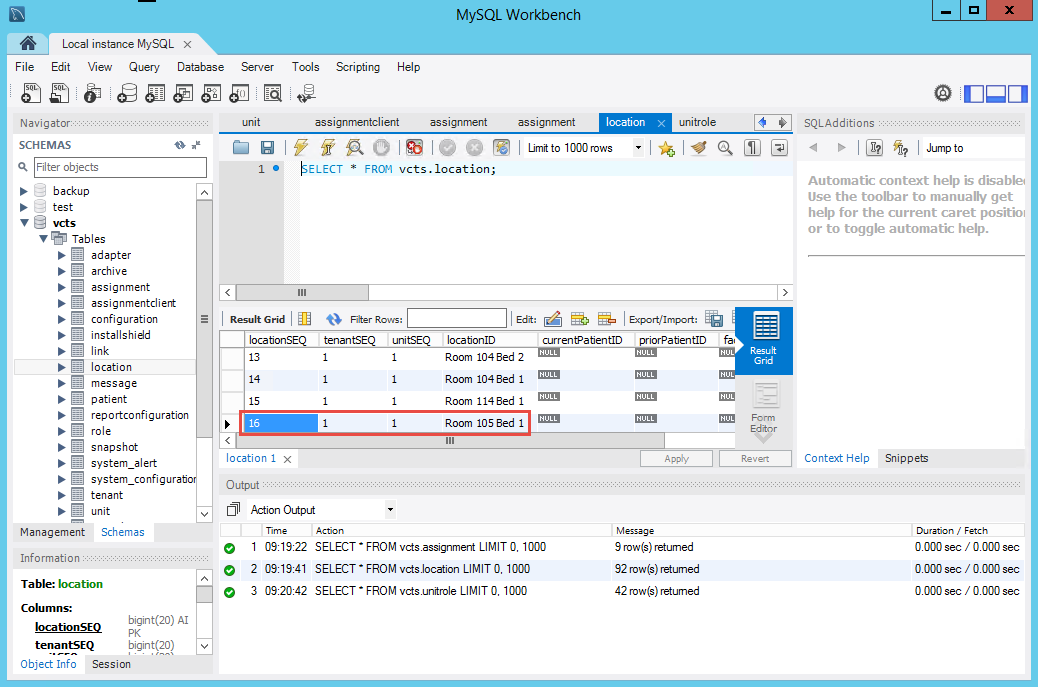
-
Scroll down in the table until you see a locationID that the connection should have assigned,
and make a note of the locationSEQ value.
For example, if you are expecting an assignment for the Room 105 Bed 1 location, note that locationSEQ is set to 16:
-
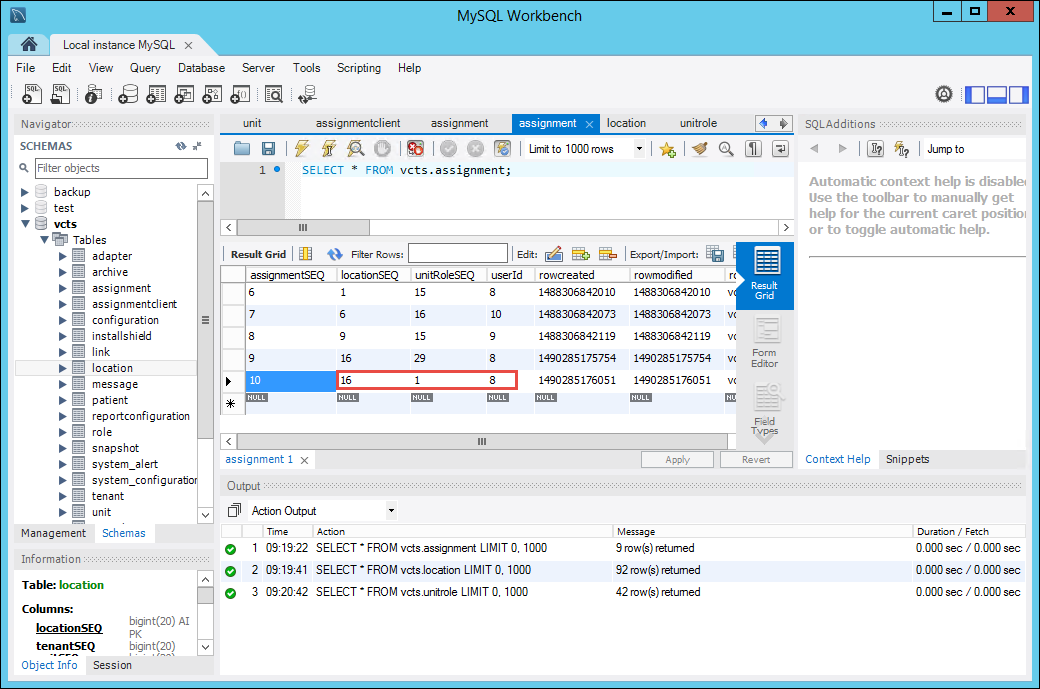
Right-click the assignment table, choose Select Rows - Limit 1000,
navigate to the locationSEQ whose value is set as you expected, and make a note of the
unitRoleSEQ and userId values.
The userId value uniquely identifies the user who has been assigned to this location. The unitRoleSEQ value allows you to determine the role that the user was assigned to.
For example, navigate to the locationSEQ whose value is set to 16 and note that unitRoleSEQ is set to 1 and userId is set to 8.
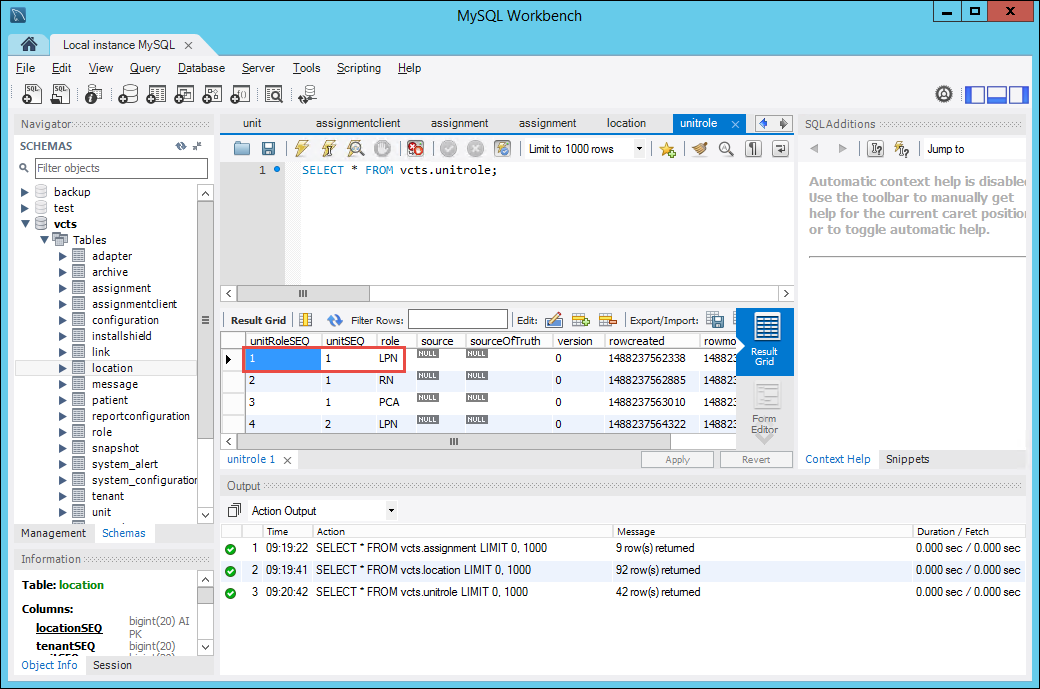
-
Right-click the unitrole table, choose Select Rows - Limit 1000,
navigate to the unitRoleSEQ whose value is set as you expected, and make a note of the
role value.
This value should be the same as the role you intended to assign.
For example, navigate to the unitRoleSEQ whose value is set to 1 and note that role is set to LPN.