To configure the Vocera Voice Server and VMP to work together, you must access the Vocera Voice Server Administration Console and the VMP Administrator to make the necessary changes.
-
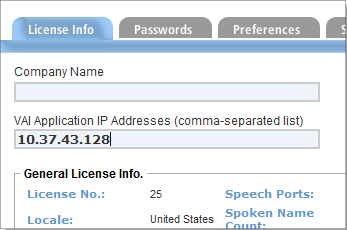
Select the License Info tab.
-
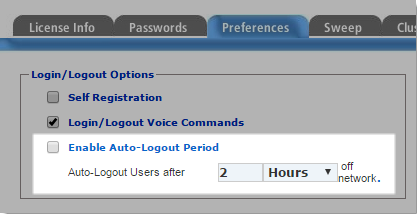
If the Enable Auto-Logout Period checkbox is
selected, set the auto-logout period to a value greater than
1 Minute. This ensures that clients that
use the iOS operating system are not unexpectedly logged out.
-
Select the Enable VMP checkbox.

-
Select Configuration > System Options.

The System Options dialog box appears.
-
Scroll down the System Options dialog box to the
Vocera Voice section. This displays the
Vocera Voice Server configuration options.
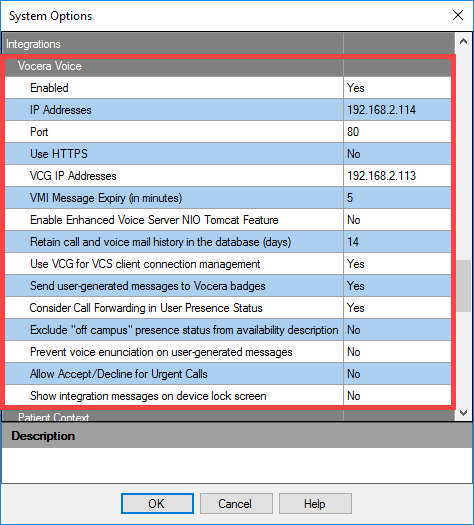 Important: If you change any of these values, you must manually restart the VMP Server by restarting the Vocera Data Exchange Service. See Starting and Stopping the VMP Server for details on how to do this.
After you have configured the Vocera Voice Server and VMP to work with one another, the next step is to import the Vocera Voice Server contacts into the VMP Server. See Importing Users From Vocera Voice Server for information.