This document provides a step-by-step guide for end users on how to register a new application in the Azure portal. This application registration process is necessary for configuring email settings in Vocera Analytics. Follow these instructions carefully to ensure a smooth registration process:
Note:
- Cloud Application Administrator Access is required.
- Microsoft Azure AD has been renamed to Microsoft Entra ID.
- Access App Registrations
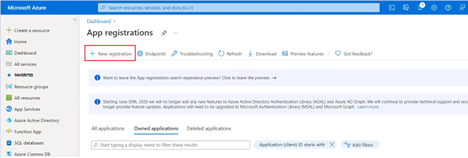
- In Azure Portal, Under Azure Directory, click on App Registrations.
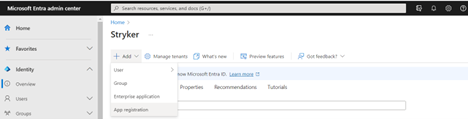
- In Microsoft Entra Admin Center, Click on Add and select App registration..
- Register a New Application
- In Azure Portal,Select New Registration to begin the application registration process.
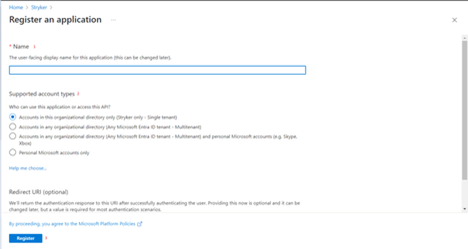
- Enter Application Details
- Enter a name for your application in the Name field.
Example: VoceraAnalyticsEmailApp
- For Supported account types, select Accounts in this organization directory. Leave the other options as it is.
(Note: If you need to support accounts from any organizational directory, you can choose your preferred option accordingly).
- Click Register to complete the registration process.
- Enter a name for your application in the Name field.
- Copy Application ID and Tenant ID
- After successful registration, locate and copy the Application (Client) ID and Directory (tenant) ID from the displayed window. You will need these IDs for configuring your email in Vocera Analytics.
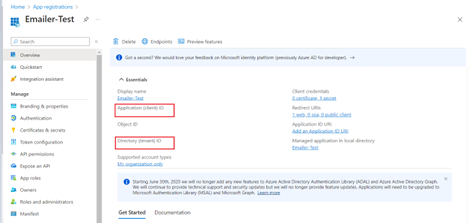
- Client ID (Application ID): This unique identifier is assigned to your application upon registration. It is used to identify your application when requesting access tokens and interacting with Azure services. Keep this ID secure, as it helps authenticate your application within the Azure ecosystem.
- Tenant ID (Directory ID): This identifier represents your organization’s Azure Active Directory (AAD) tenant. It is crucial for distinguishing your directory from others in the Azure cloud. The Tenant ID is used in various scenarios, including setting permissions and managing users within your organization.
- After successful registration, locate and copy the Application (Client) ID and Directory (tenant) ID from the displayed window. You will need these IDs for configuring your email in Vocera Analytics.
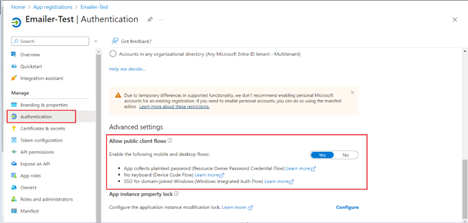
- Allow Public Client Flows
- Under Authentication, look for Advanced settings at the end of the page.
- Select Yes for Allow public client flows.
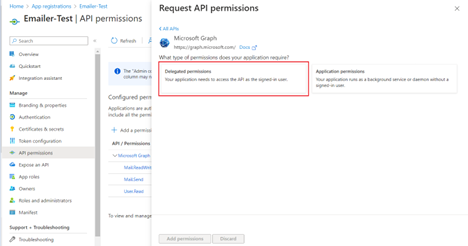
- API Permissions
- In the left-hand menu, navigate to API Permissions.
- Click on Add a Permission
- Select Microsoft Graph
- Choose Delegated Permissions
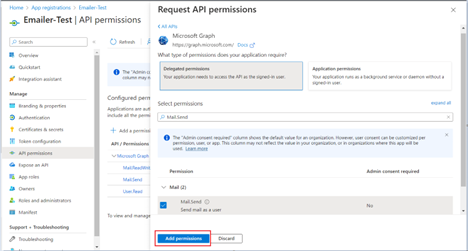
- Add the following permissions by searching for them:
a. Mail.Read/Write (Allows the app to create email in user mailboxes. Provides Read and Write access to user mail).
b. Mail.Send (Allows the app to send mail as user in the organization of which credentials are provided)
c. User.Read (Allows user to sign-in to the app with organizational account and let the app read basic profile to generate access token).
- Click on the Add Permissions button.
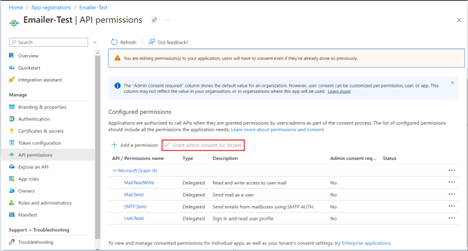
- Provide admin consent for all permissions by clicking on the button next to Add a permission.
By following these steps, you have successfully registered your application in the Azure Portal/Entra ID, allowing you to configure email settings in Vocera Analytics. If you encounter any issues during this process, please seek assistance from your organization's IT support or Azure administrator.
- The email account must be part of your organization's Azure Active Directory.
- The email account must have an active mailbox.
- The email account must have multi-factor authentication disabled.
Ensure that the email account you plan to use comply with these requirements based on the settings you selected during the registration process.