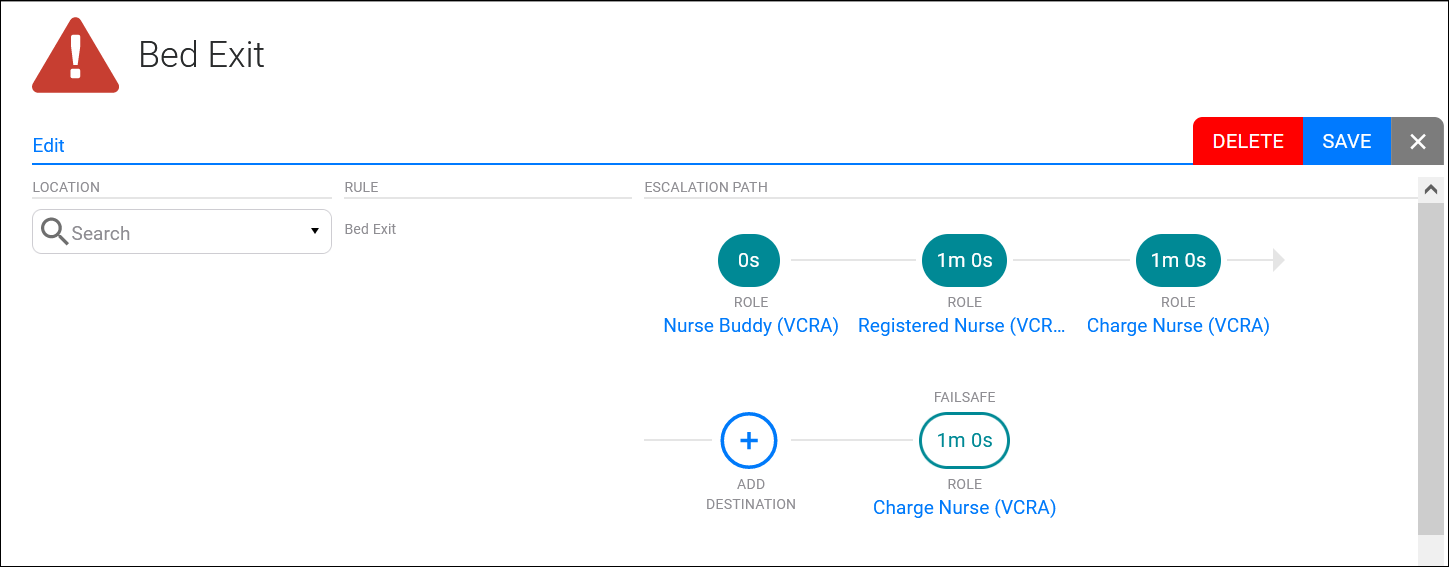
Each destination in the escalation path will define the destination type, and the time to elapse before escalating the message delivery to the next destination in the path.
When the dataset Type specified in the alarm definition is Clinicals, the escalation path will include a minimum of one failsafe destination and one normal destination.
- Navigate to the rule configuration settings.
- When creating a new rule, complete the New Rule settings to display the Escalation Path settings.
- When editing a configured rule, select Edit in the More icon (three horizontal dots) dropdown list.
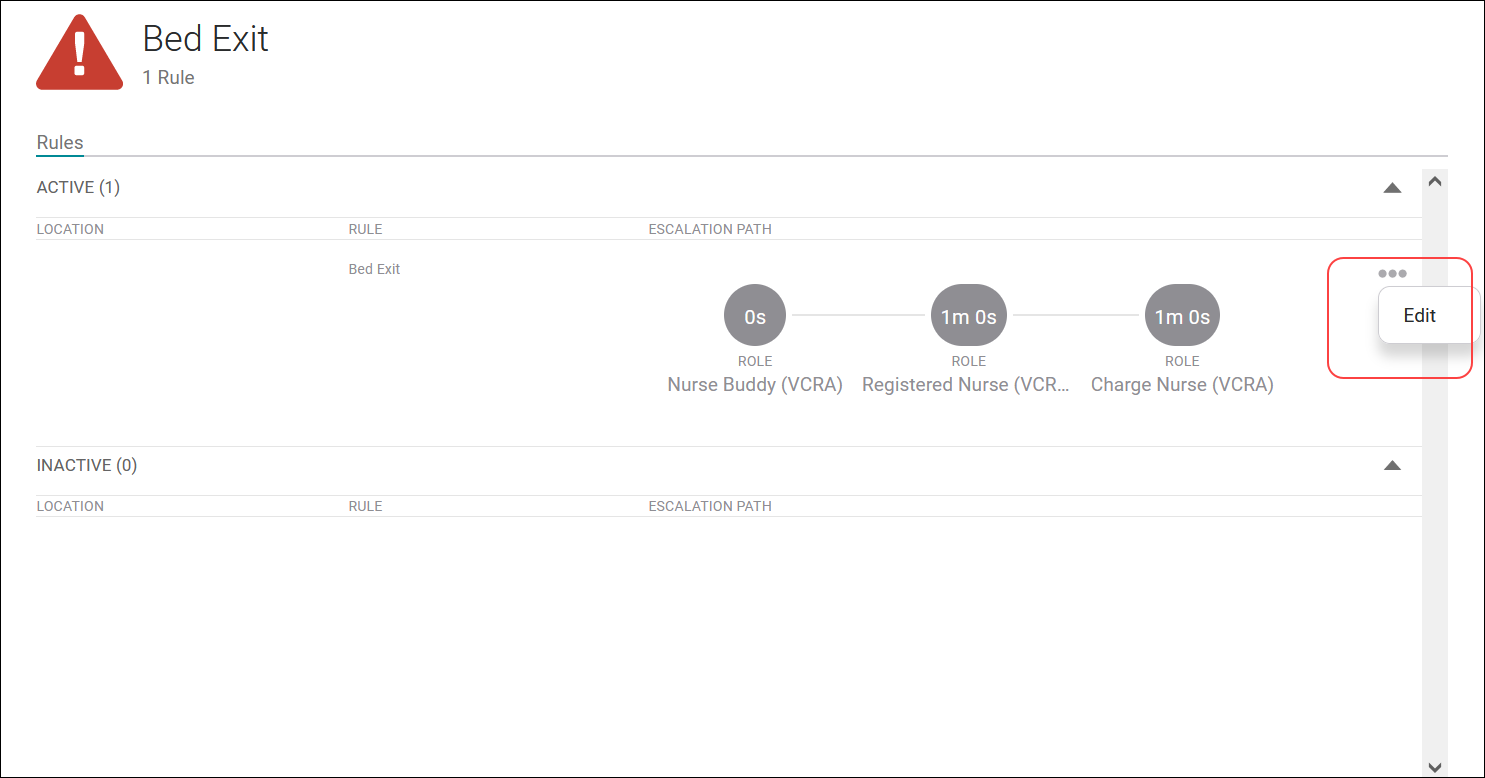
The rule configuration settings display.
- Click Add Destination or Add Failsafe (blue circle with plus sign icon) in the Escalation Path.

The destination dialog displays.
- Complete the destination configuration settings for the escalation path.
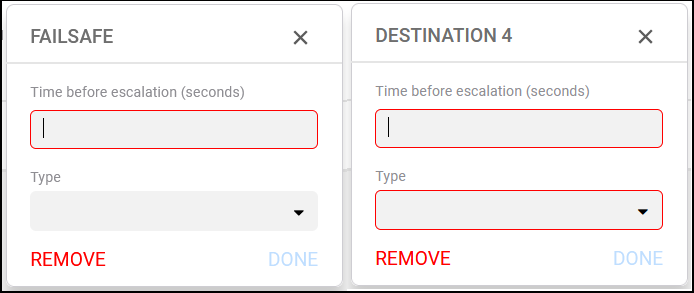
Each destination is identified by number in the dialog header, and the failsafe destination is identified by name. Click the black X in the header to close the dialog without saving any of the settings in the system.
Note that after clicking in a configuration field, the field is highlighted in red if you move away from the field with out entering a value.
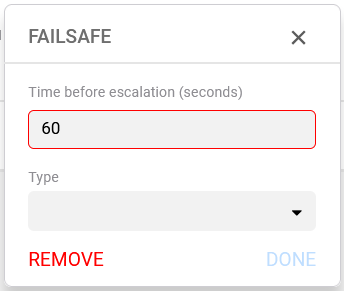
- Enter a value in the Time before escalation text field.
Enter the time in seconds that the recipient has to respond to the alarm or alert message.
After this time has passed without a response, the message will be escalated to the next destination in the escalation path.
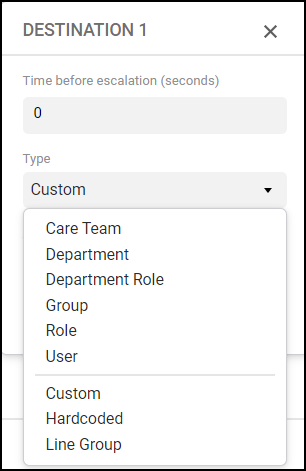
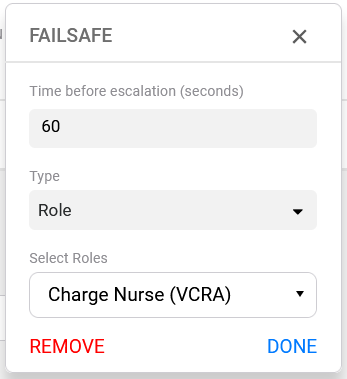
- Click the Type field to select a recipient type for the destination.
The recipient type defines who will receive the alarm or alert message for the destination.
This Type dropdown list displays two categories of recipients. The first category is composed of Care Team, Department, Department Role, Group, Role, and User recipient options. The second category contains the Custom, Hardcoded, and Line Group recipient options.
By default, Care Team will escalate to Bed Based. Department will escalate the message to users in the configured facility department. Group, Role, and User will display the list of configured recipients by unit to which the message may be escalated.
Custom, Hardcoded, and Line Group options provide configuration fields to define the recipients for the destination.
Select Care Team, Department, Department Role, Group, Role, or User, and enter characters in the Search field to locate destination recipients.
Department Role is used when a user wants to send a message to some, but not all roles, department wide.
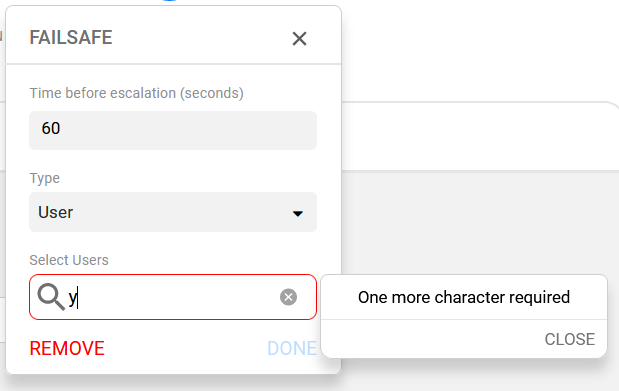
Enter two or more characters in the Search field.
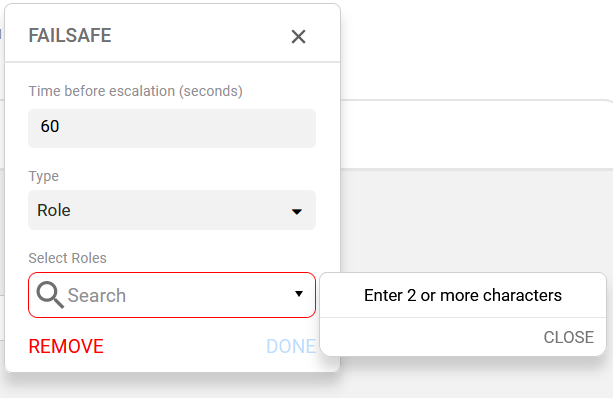
A message reminds you to enter additional characters in order to return search results.
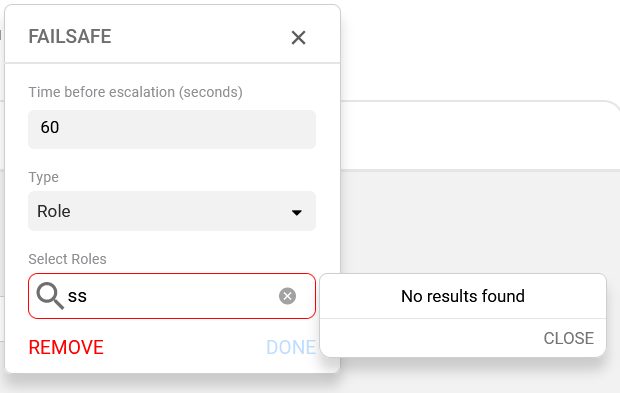
A message displays when no results are returned by the search on the characters entered in the text field.
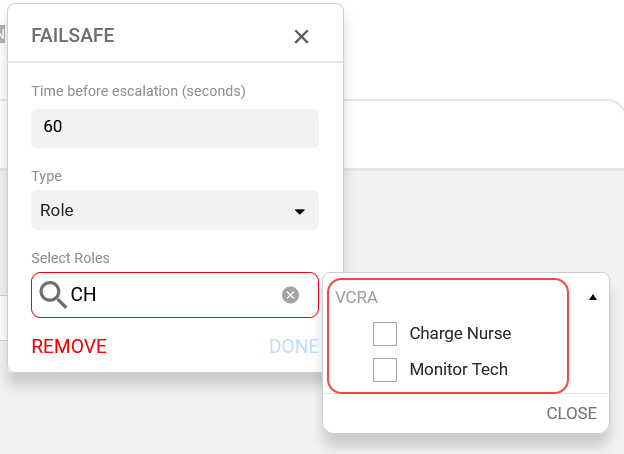
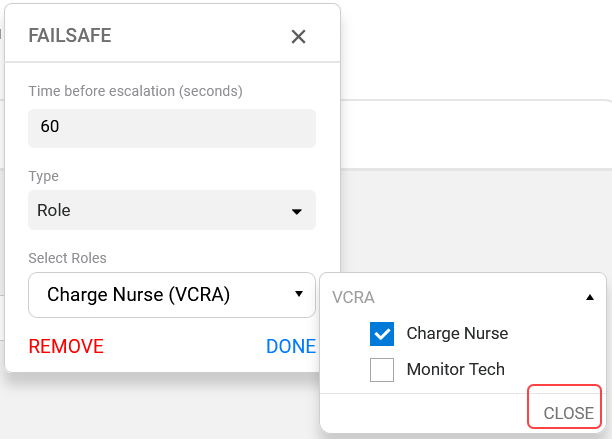
- Select a Group, Role, or User from the respective list returned in the Search field.
This field's label is dependent on the selected Recipient Type. For example, when User is the recipient type, this label is "Select Users".
Select at least one recipient from the list who will receive the alert message for this destination in the escalation path. This list is dynamically populated.
In this example, the Role destination type is selected, and the search list displays configured roles by unit.
- Select Close in the recipient pick list.
- OPTIONAL: Select the Hardcoded recipient category.
Enter the Value required to identify the recipients for the message. Enter the address or phone number in the Value field, and then select the device adapter from the Endpoint list.

- OPTIONAL: Select Line Group destination Type.
Enter in the time before escalation. Type in the value of the Line Group that you wish to deliver to. Remember that 2 characters must be entered into the field to enable search.

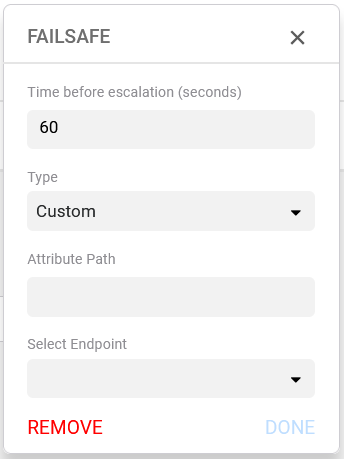
- OPTIONAL: Select the Custom destination Type.
Type an entry into the Attribute Path field to specify the recipient. Select the device adapter from the Endpoint list.
- Select Done to save the recipient configuration settings.
Select one of the following to exit the destination dialog.
-
Remove — Clear the destination configuration fields. The destination can be re-created.
-
X — Close the dialog without making a change to the destination.
-
Done — Save the destination configuration, close the dialog, and display the escalation path settings.
-
- Select Save to preserve the settings configured in this destination in the escalation path.
Select an option to exit the rule configuration settings.
-
Delete — Displays the Delete Rule dialog where you can select OK or cancel your edits.
-
Save — Displays the Save Rule dialog where you can save or cancel your edits.
-
X — Exit the rule configuration settings without making any change to the system.
-