After the schedule is created in QGenda, the system administrator can pull the schedule into the Vocera Edge Enterprise Manager.
- Click .
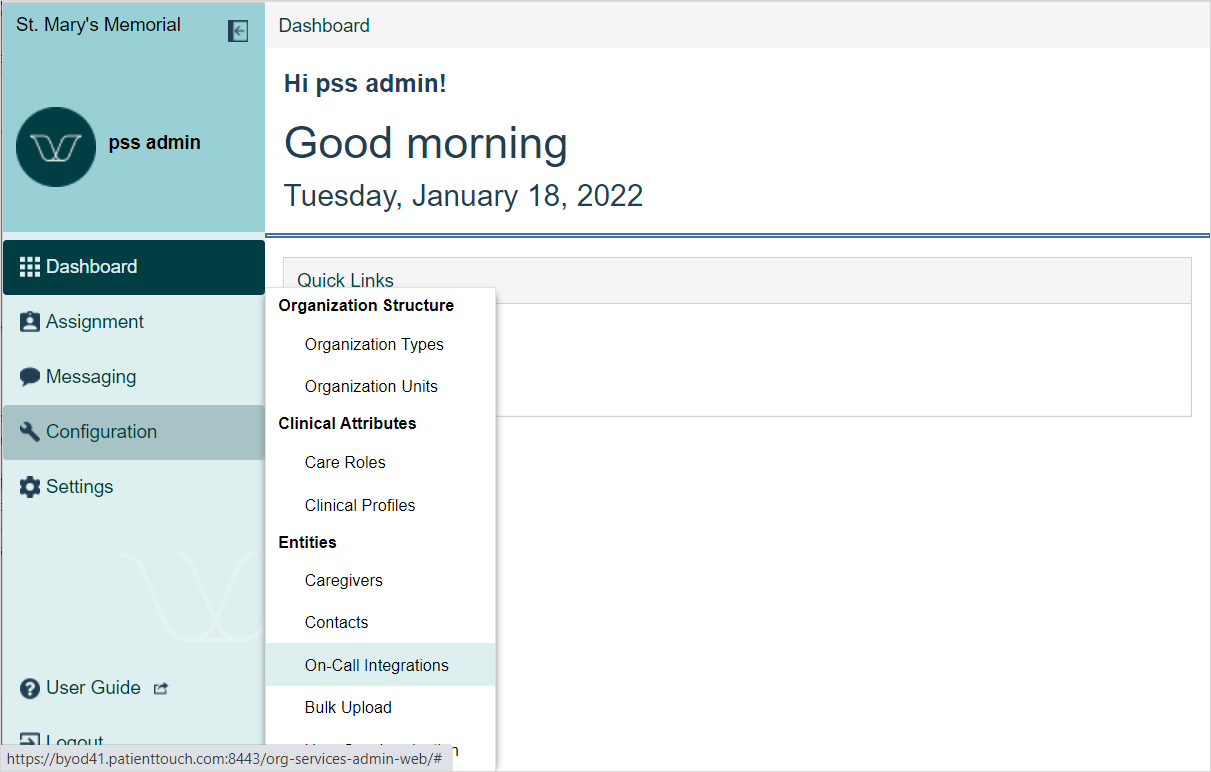
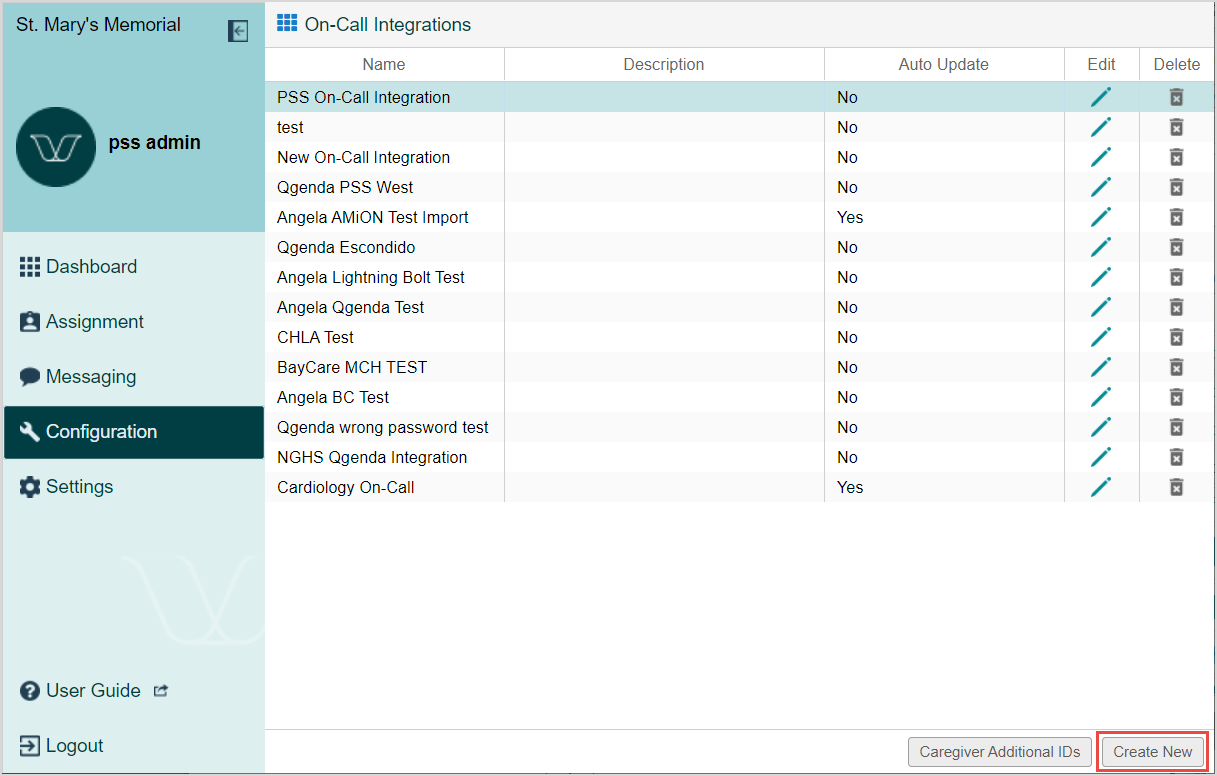
- Click Create New.
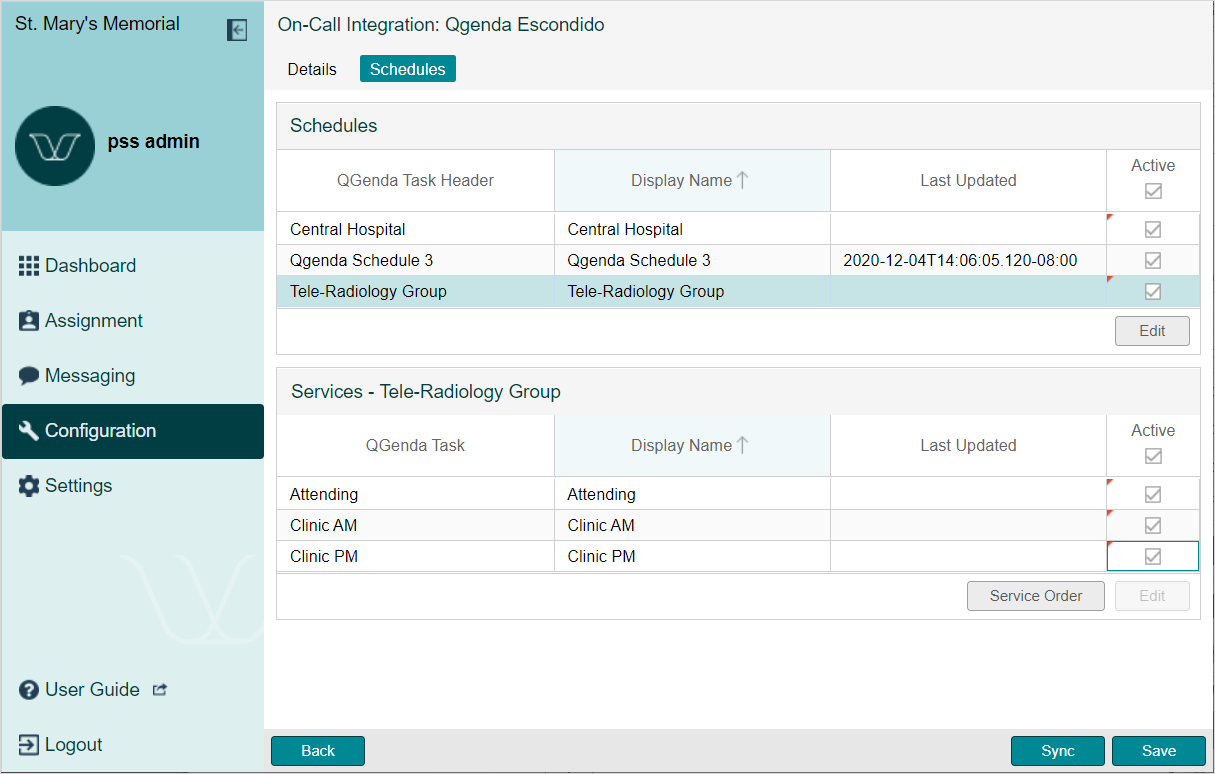
- Click Sync to update the service notes and assignments for any active schedules and services, regardless if the sync was manually triggered via the button or running on auto update.
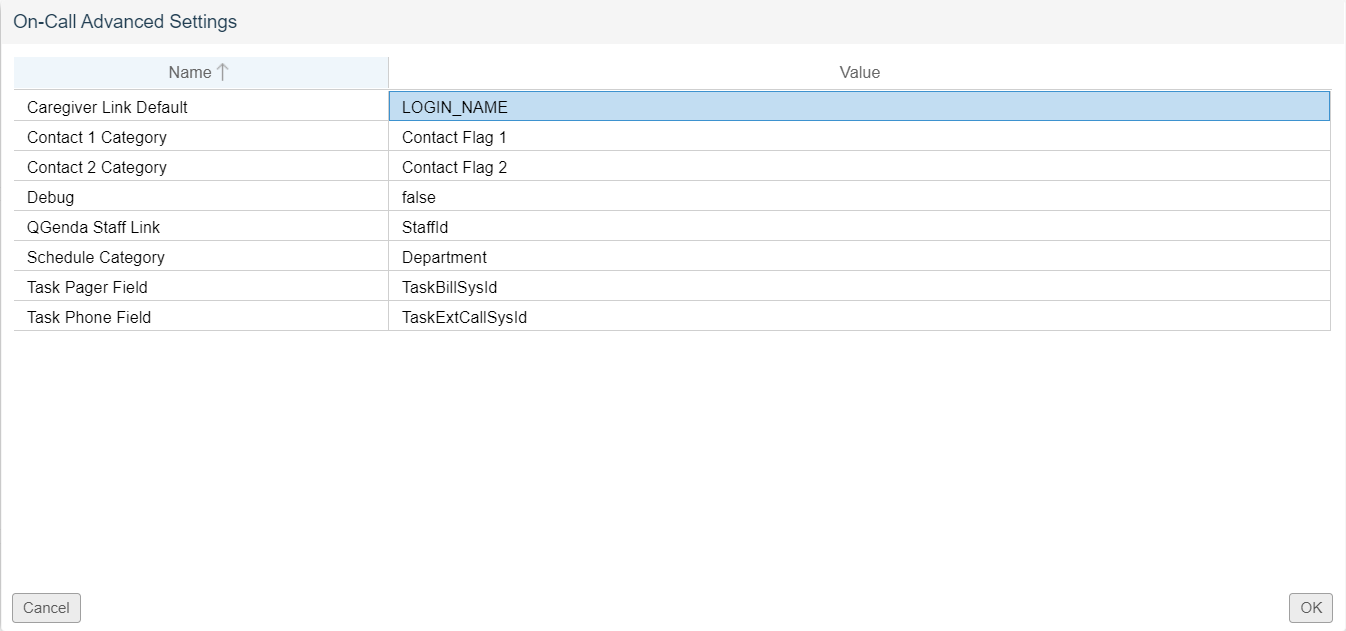
After you click Save, the Advanced Settings display.
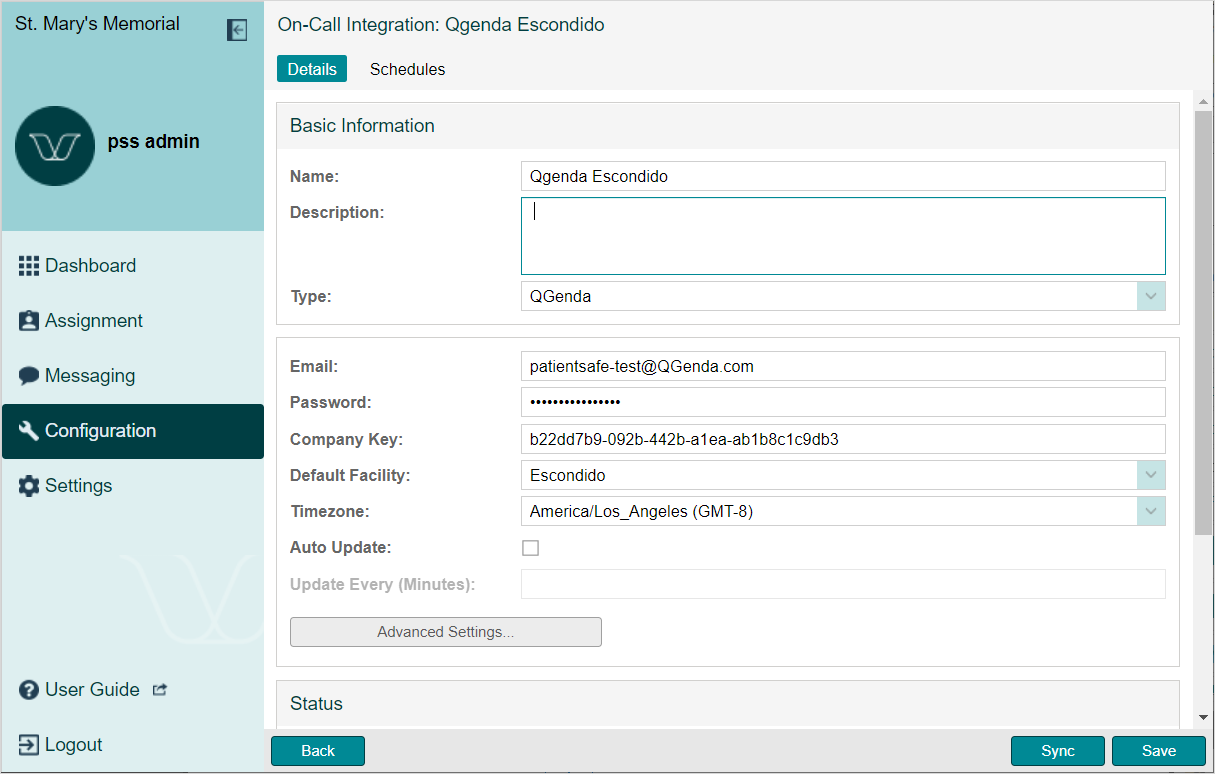
- Complete the following Advanced Settings:
- Enter the QGenda Staff Link by entering the QGenda StaffId.
Please contact Vocera Edge Technical Support for additional assistance with Advanced Settings.
- Enter the QGenda Staff Link by entering the QGenda StaffId.
- Double-click a schedule or service to view details.
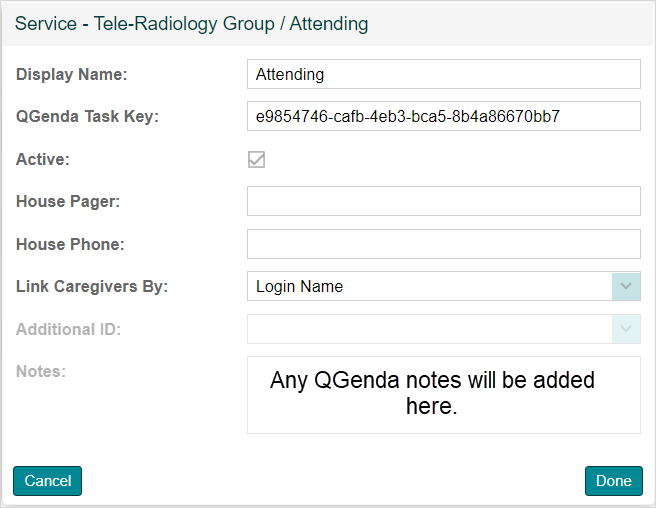
- Click Done. See sample Schedule screen below.
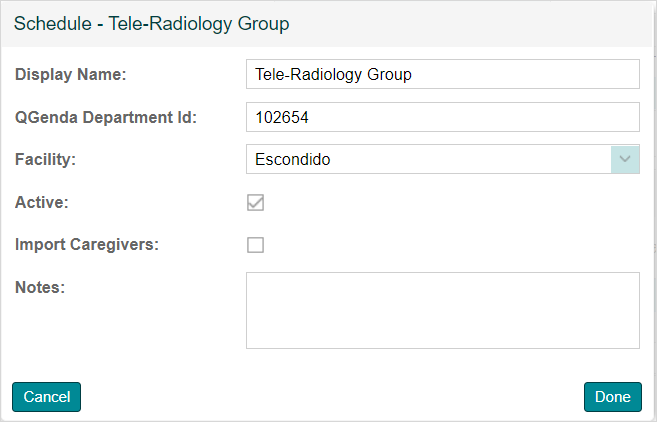
- QGenda sends task notes to the Notes field. With a QGenda note, the Notes field is grayed out and not editable. QGenda notes contain additional service information. For example, "Contact x5555 if unreachable." See sample Service screen below.