The Report Scheduler tab allows you to schedule automatic generation and distribution of reports.
Vocera Analytics provides several reports, and manually generating and distributing each report on a recurring basis is time-consuming. The Report Scheduler makes it simple and easy to schedule reports, automatically generates and distribute reports to the appropriate users.
The Report Scheduler allows you to:
- Schedule reports that can be distributed to a shared file server or a mailing list proactively.
- Make efficient use of reports by distributing them to a variety of different users.
- Reduce administration of Vocera servers.
To access the Report Scheduler option:
Navigate to Settings > Report Scheduler on the top right corner of the Vocera Analytics Visualization Server.
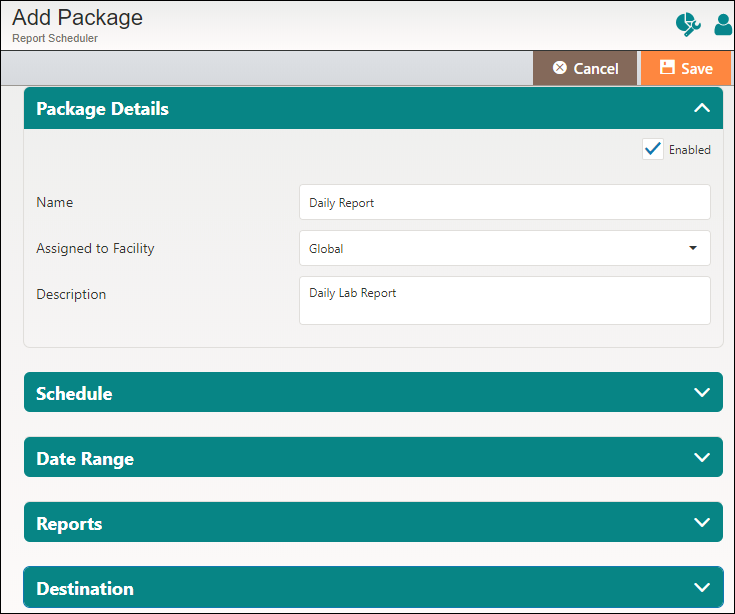
Adding Package Details
Package details help you provide basic information about the report package.
- Click Package details.
The package details page is displayed.
- Provide information as per the table in the following table:
Field Description Enabled Ensure that the checkbox is checked to enable the package schedule. To disable the package schedule, uncheck the Enabled check box.
Name Enter a name for the report package (up to 50 characters). Assigned to Facility Select a facility for the package. The facility you select will be used for the Facility and Facility report parameters of the owner and also filter email recipients for package destinations. Description Enter a description of the report package (up to 250 characters).
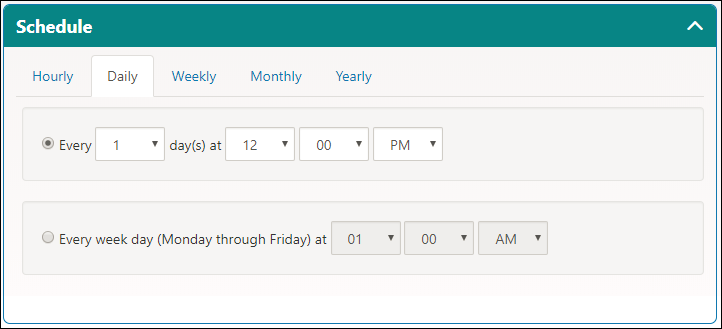
Scheduling Report Package
The schedule section specifies the timeframe for which the report package must be scheduled.
- Click Schedule.
The schedule page is displayed.
- Select options as required per the information mentioned in the following table:
Field Description Hourly Click Hourly to generate reports on an hourly basis. Specify the interval and the time that the report package should be scheduled.
Daily Click Daily to generate reports on daily basis. To schedule the report package every day, select Every 1 day(s). To skip days, select Every 2 day(s), Every 3 day(s), and so on, up to the number of days you want to skip. Specify the interval and the time that the report package should be scheduled.
To schedule the report package only on weekdays, select Every Week Day (Monday through Friday) at and specify the time that the report package should be scheduled.
Weekly Click Weekly to generate reports on a weekly basis. To schedule the report package every week, select the day or days that you want to schedule.
Ensure boxes are checked for the days of the week (Sunday through Saturday) you want to schedule the report package. You can check multiple boxes.
Monthly Click Monthly to generate reports on a monthly basis.
To schedule the report package every month, select On the n day of every x month(s) and specify the time that the report package should be scheduled. For example, On the 2nd day of every 1 month(s) at 05: 30 PM.
To skip months, select On the n day of every 2 month(s), On the n day of every 3 month(s), and so on, up to the number of months you want to skip.
You can also schedule the report package based on any day of the week in a month. For example, On the Last Friday of every 1 month(s) at 6:00 PM.
Yearly Click Yearly to generate report on a yearly basis.
To schedule the report package every year, select Every (month) on the n day and specify the time that the report package should be scheduled. For example, Every January on the 1st day at 06: 30 PM.
You can also schedule the report package based on any week of a month. For example, On the First Monday of December at 4:00 PM.
Date Range
The date range section specifies the date range to be considered for the report package.
- Click Date Range.
The Date Range page is displayed.

- Select options as required per the information mentioned in the following table:
Field Description Date Range Use the date range controls to specify the date range for the report: Click one of the following:
Last n Hour(s)
Last n Day(s)
Lastn Week(s)
Last n Month(s)
n denotes the relative range. Select a number in the field to specify how large the range is.
For example: Last n Days includes the day that the report is generated. If you specify “Last 1 Days” for the date range, the report includes data from the previous day until the time of the scheduled dataload for the current day
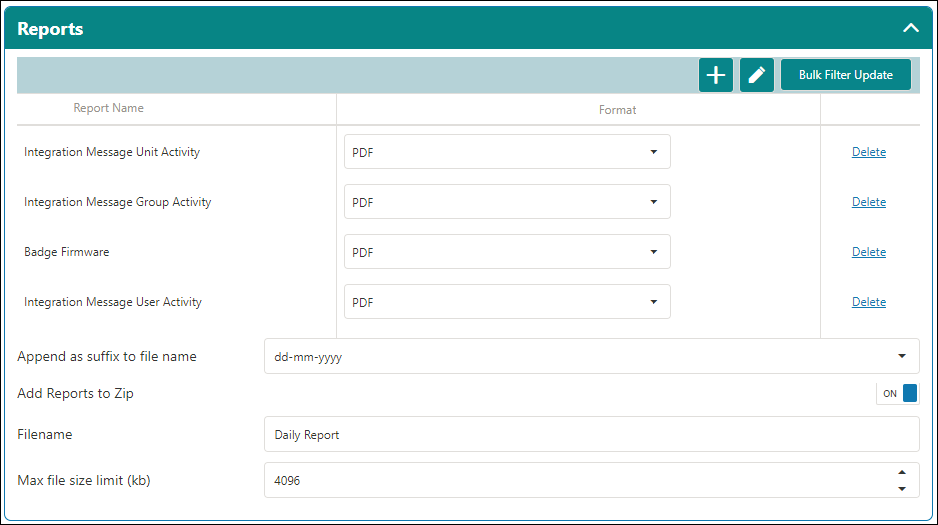
Reports
The Reports section lets you select the reports to be be added to the report package. It also lets you define the report format, filename and maximum file size of the generated report package.
- Click Reports.
The Report page is displayed.
- Select options as required per the information mentioned in the following table:
Field Description Add Report Click the + to open the Add Reports dialog box and add reports to the package. Click Save to close the dialog box. Edit Report Filter Click the Edit to edit the report filters. Bulk Filter Update Click Bulk Filter Update open the Edit Report Parameters dialog box and edit the filter parameters. Click Save to close the dialog box. Format Select the format for the reports that are included in the report package.The options are: - CSV
Delete Select a report and click the Delete to delete a report that you added. Append as suffix to file name Select a timestamp option to append it to the report package. Add Reports to Zip Select ON to automatically zip the report package. Filename Specifies the filename of the report package. Max file size limit (kb) Specifies the maximum file size of the report package. The default file size is 4096 KB. However, you can increase or decrease the file size.
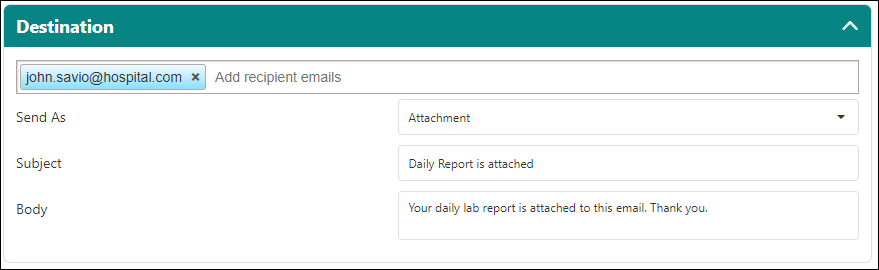
Destination
The Destination page of the Add/Edit Package Schedule dialog box lets you specify the destination of the report package. You can link the report to a destination folder or distribute it as an attachment by email.
- Click Destination.
The following Destination page is displayed.
- Select options as required per the information mentioned in the following table:
Field Description Add recipient emails Specifies the email address of the recipient that receives the report package. Send As Specifies the delivery format of the report package. You can link the report to a destination folder or send it as an attachment. Subject Specifies the subject of the email for the report package. Body Specifies the contents of the email.