Description of the settings that enable direct communication between the Vocera XMPP Adapter and the Vocera Platform.
-
Complete the configuration fields as described in the table, for new or
existing adapters. This table describes a portion of the fields provided in the
configuration dialog.
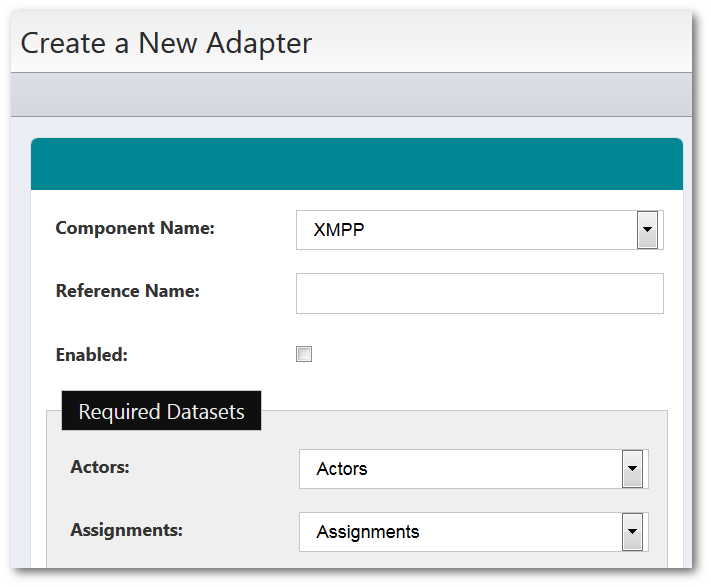
Configuration Field Description Component Name Click the Component Name field to display a list of the systems and devices that the Vocera Platform currently supports. Select the name of the adapter to create. Reference Name Enter a short descriptive name in the Reference Name field to uniquely identify an adapter instance. It may demonstrate the adapter function or other information; for example, Production adapter may differentiate a live adapter from a development or "sandbox" adapter. Enabled Select the Enabled checkbox to allow the Vocera Platform to use the new adapter. The Vocera Platform ignores the adapter if this option is disabled. Required Datasets If more than one dataset exists that meets the adapter's requirements, select the appropriate datasets for the new adapter to function correctly.
The system searches for the datasets that meet the adapters requirements. If the datasets already exist, the system will use them. If the datasets do not exist, the system will create them automatically.
Select Create in the drop-down menu to create a new dataset to meet the organization's requirements, if needed.
Note: If Rules in a dataset are configured in a way that multiple rules fire for the same alert at the same time, some messages may not be delivered. -
Complete the Main Adapter Settings configuration fields
as described in the table, for new or existing adapters. This table describes a
portion of the fields provided in the configuration dialog.
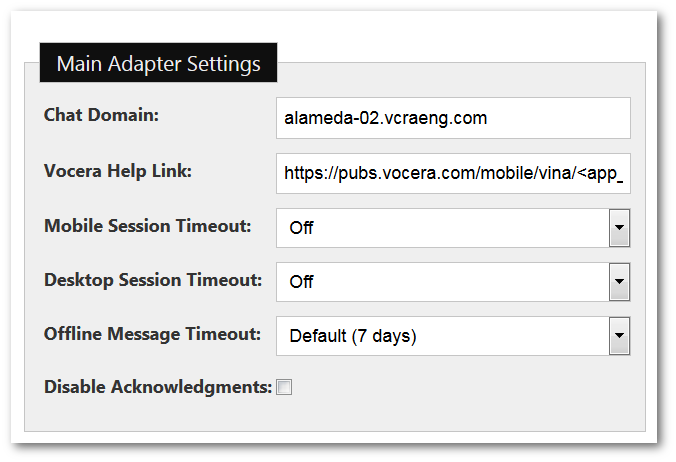
Main Adapter Settings Configuration Field Description Chat Domain Enter the domain name for which the XMPP server will respond, such as facility.net or company.com. This should be a unique name that identifies the instance of the Vocera XMPP Adapter. Set this domain name in the DNS to allow XMPP clients to locate the service.
Warning: The DNS must be configured to have the same domain, for example "vocera.myhospital.com", points to the Vocera Platform appliance (internally) and to Edge (externally). Failure to do so will prohibit the Vocera Platform appliance from functioning properly.Vocera Help Link Enter a help link used by the XMPP mobile client to direct a user to a webpage that can be used to offer limited support. Mobile Session Timeout Select a time duration of Off, 13 hours, or 7 days from the drop-down menu. This setting defines the period of time that the mobile client will allow the current user to stay logged in after the mobile application goes into the background.
Once the selected threshold is passed, the current user is automatically logged out of Vocera Platform.
Mobile Session Timeout will never expire when it is set to Off, and the user will remain logged in indefinitely. Otherwise, select 13 hours or 7 days as the timeout value.
Desktop Session Timeout Select a time duration of one of the listed options in minutes, hours, or days from the drop-down menu. This setting defines the period of time that the desktop client will allow the current user to stay logged in after the last activity in the mobile application.
Once the selected threshold is passed, the current user is automatically logged out of Vocera Platform.
Desktop Session Timeout will never expire when it is set to Off, and the user will remain logged in indefinitely.
Offline Message Timeout Select a time duration from the drop-down menu. This setting defines the period of time that the Vocera client will store messages in memory for offline users.
Once the selected threshold is passed, the messages will no longer be stored.
Selecting Default will use the best practice timeout for the current adapter release version. For example, the best practice default value is 7 days.
Disable Acknowledgments Select this option to disable message acknowledgment support.
This checkbox does not actually disable storing Acknowledgeable Messages or their responses; this checkbox only prevents detection of the feature.
-
Complete the Roster configuration fields as described in
the table, for new or existing adapters. This table describes a portion of the
fields provided in the configuration dialog.
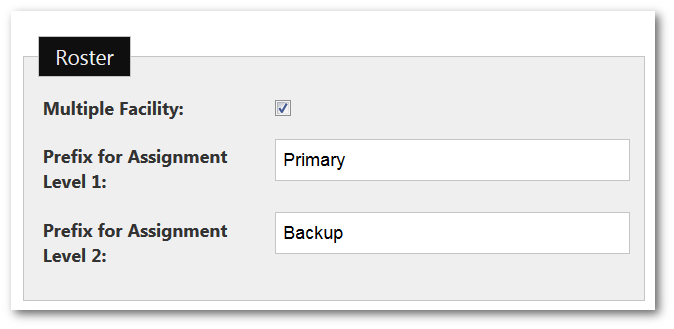
Roster Configuration Field Description Multiple Facility Select this checkbox for installations that service more than one facility, where unit names may be duplicated.
When the Vocera XMPP Adapter is configured for multiple facilities, the unit names in the roster will have the facility name prefixed to the unit. For example, an installation can differentiate two ICUs in the device roster by displaying the facility name; Central ICU and North ICU.
Prefix for Assignment Level 1 Enter the value to be added as a prefix to the role name for assignments with a level value of "1" when an assignment for the same location and role exists with level "2".
If the value is not set (due to an older configuration), the value 'Primary' is used.
Prefix for Assignment Level 2 Enter the value to be added as a prefix to the role name for assignments with a level value of "2" when an assignment for the same location and role exists with level "1".
If the value is not set (due to an older configuration), the value 'Backup' is used.
-
Complete the Phone Number Transformations configuration
fields as described in the table, for new or existing adapters. This table
describes a portion of the fields provided in the configuration dialog.
Phone number transformations are site specific settings needed by Vocera Vina clients. These settings are transparent to the Vocera XMPP Adapter and are passed to Vocera Vina clients when client settings are retrieved. These allow phone numbers dialed by Vocera Vina clients to be modified so the call can be completed depending on the client's dialing configuration (VOIP vs Cellular).
When a Vocera Vina user dials a phone number and the client is configured to dial using Cellular, the Vocera Vina client will scan the list of phone number transformations and apply the first one which matches the pattern. When the number matches the patten, the mask associated with the matched patten is applied to the number. The call is then routed with the new number. Each phone number transformation requires a mask, pattern, and an active flag. The transformation can also take an optional reference name.
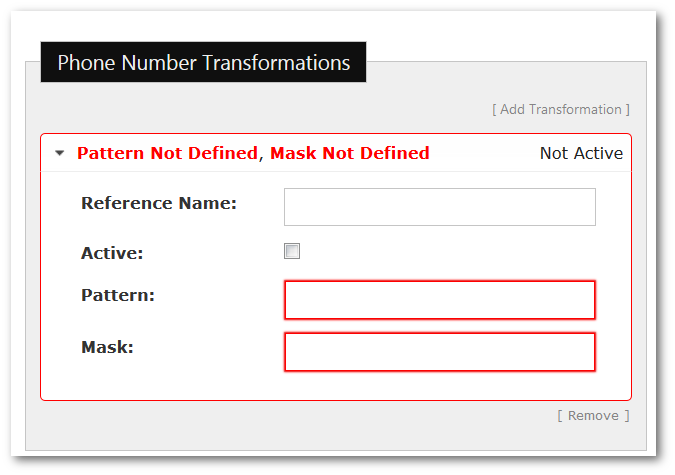
Phone Number Transformations Configuration Field Description Reference Name Enter an identifier for the phone number transformation entry. This field is optional. Active Select the checkbox to flag the transformation as active in the system. Pattern Enter the pattern for the phone number to match. In a matching pattern, X will match any digit, and the number of digits must match the number of digits in the phone number. Spaces and these characters are ignored: ) - , . (
Patterns are applied when Cellular dialing is selected in Vocera Vina, to support dialing an internal number from the Cellular network.
Patterns are also applied when Jabber or VOIP dialing is selected in Vocera Vina and the dialed number is 10 digits or longer, to support dialing an external number with a prefix from the internal network.
Mask Enter the mask to apply to the phone number in the transformation. -
Complete the Patient Details configuration fields as
described in the table, for new or existing adapters. This table describes a
portion of the fields provided in the configuration dialog.
The Vocera XMPP Adapter can provide patient details in addition to the default information and any alert context. For example, these patient details can also be used when linking a patient to a conversation.
The default patient attributes include first and last name, date of birth, sex, and facility admit date. The Vocera XMPP Adapter can be configured to query the database for additional patient attributes when the following Patient Details fields are configured.
Once created, the patient details are ordered by default attributes first, and followed by the sortable items configured as described here.
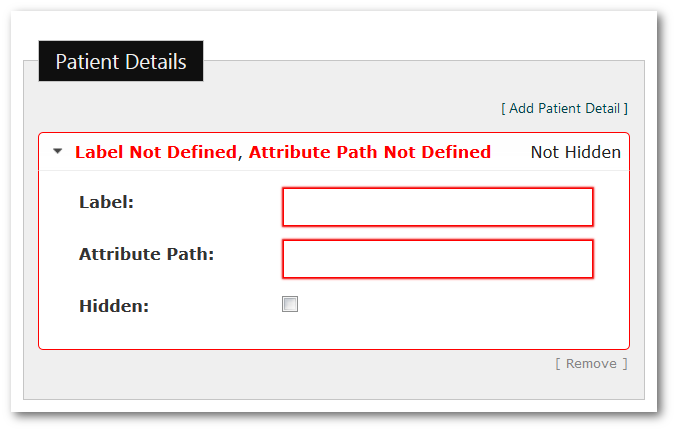
Patient Details Configuration Field Description Label Enter a unique label for the value to be added to the patient details. This field is required.
For example, enter 'airstripone.room' when the room that the patient is admitted to should be included in the additional patient details.
Attribute Path Enter the attribute path of the value to be added to the patient details. This field is required.
For example, enter the 'bed.room.room_number' attribute path in this field to add the patient's room to the details.
Hidden Check the Hidden checkbox to configure the adapter to not display the patient detail in the client.
When the patient detail is used in a third party integration, the customer may prefer not to display the specified data in the client. When this checkbox is selected, the label in the upper right corner of the Patient Details window changes from 'Not Hidden' to 'Hidden'.
-
Complete the Patient Locaton Transformation
configuration fields as described in the table, for new or existing adapters.
This table describes a portion of the fields provided in the configuration
dialog.
Patient Location Transformations are an ordered list of regex pattern and replacement pairs. These transformations are applied to a patient location with the intent of shortening the location string while preserving readability.
The first active transformation with a regex matching the location is applied to transform the location. The transformed location is then used for the location to display within the patient context (e.g., in patient-linked conversations, alerts, and roster).

Patient Locaton Transformation Configuration Field Description Reference Name Enter the identifier for the patient location transformation entry. Active Select the checkbox to flag the transformation as active in the system. Pattern Enter the regex pattern used to match a patient's location, such as ICU(.*). Replacement Enter the replacement to be applied to the location in the transformation. Capture groups can be referenced via the dollar sign, such as ICU$1.
Note that the replacement is only done once on the location.
-
Complete the Custom Parameters configuration fields as
described in the table, for new or existing adapters. This table describes a
portion of the fields provided in the configuration dialog.
Custom parameters allow the facility to define settings to be added to an alert. These settings are transparent to the Vocera XMPP Adapter, and are simply passed to the Vocera Vina application when client settings are retrieved.
Use the custom parameter configuration to create site-specific settings. The parameter name identifies the custom setting, and the defined value is added to the alert. For example, a custom parameter named "airstripone.siteid" could add the value "2030" to an alert.
To override a custom parameter, enable an alert rule using the same name.
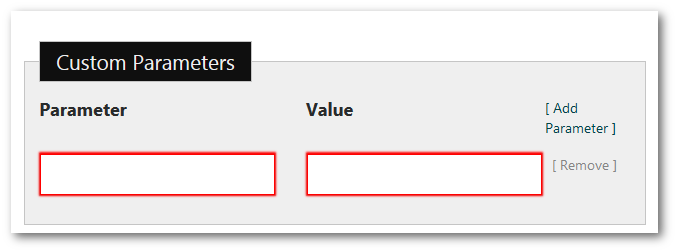
Custom Parameters Configuration Field Description Parameter Enter the name of the custom parameter to be added to the alert.
Value Enter the value of the custom parameter to be added to the alert.