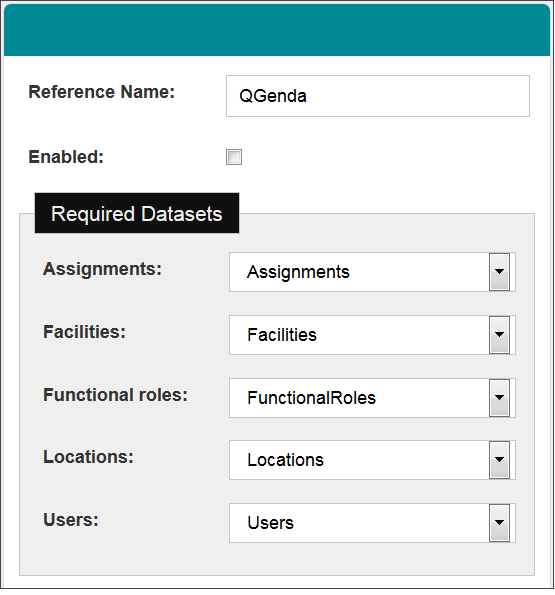
These Vocera QGenda Adapter settings enable communication between the QGenda system and the Vocera Platform.
There can be one instance of the Vocera QGenda Adapter, or multiple instances if the Polling Interval, Time Zone, or Email Login in Main Settings are required to be different for multiple companies.
Select an empty field and begin typing, or select an existing value and type over it. To keep an existing value, do not edit that field.
-
Navigate to the New Adapter option, or navigate to an existing adapter to edit.
See Creating a New Adapter and Editing an Adapter for instruction as needed.
The configuration fields are the same for new and existing adapters.
-
Complete the Main Settings configuration fields as
described in the table.
The settings described in this section provide the Vocera Platform with the explicit information required to communicate with the remote QGenda server. The configuration fields display as shown below, with required fields outlined in red. Click on a mapping form to display the configuration fields listed in the information note. Use the descriptions provided in this section to complete the Main Settings configuration fields.
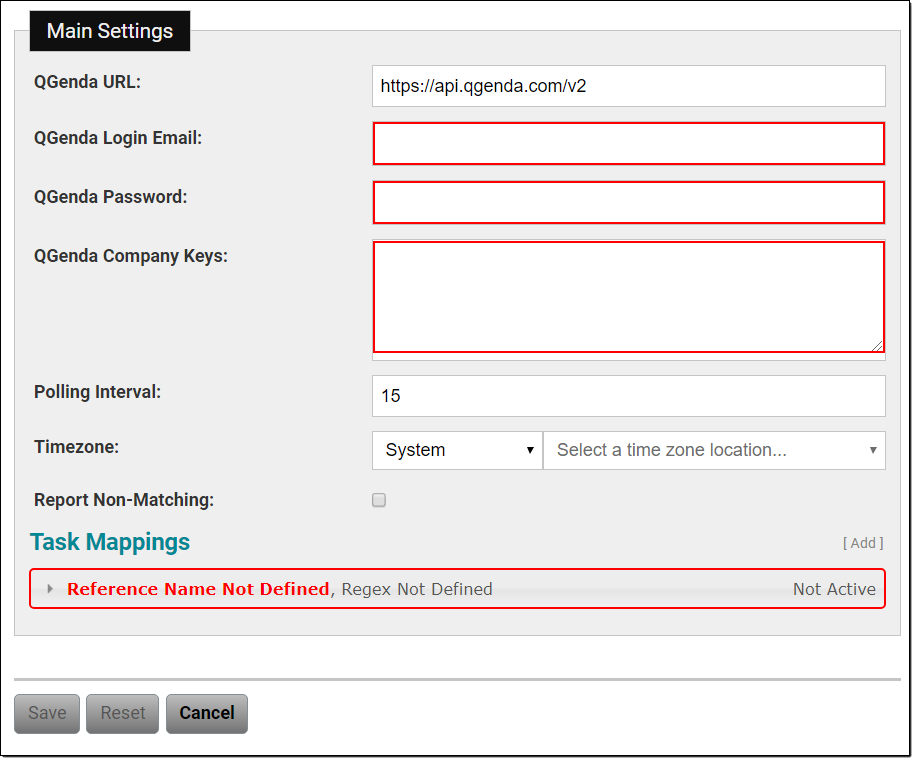
Main Settings Configuration Field Description QGenda URL Enter the URL used to contact the QGenda service. It should generally be left unchanged from the default.
This should be the root location for the API that will be used by Vocera Platform to pull the schedule from the QGenda cloud service. This field is required.
Note: Use the default QGenda URL provided in the configuration, unless otherwise specified.QGenda Login Email Enter the email login credential for the account used to make requests to the remote QGenda cloud service and return all schedules.
Enter the site-wide, non-administrative credential in this field; the value which gives Read access to all of the hospital's schedules.
This field is required.
QGenda Password Enter the login password for the QGenda account to access the remote cloud service.
Enter the site-wide, non-administrative credential in this field; the value which gives Read access to all of the hospital's schedules.
This field is required.
QGenda Company Keys Enter the QGenda-supplied keys that correspond to the companies that will be read by the adapter when requesting physician schedules. The adapter can be configured to manage multiple company keys, or each instance of the adapter could handle one company, as specified by the customer. Polling Interval Enter the value used to determine how frequently (in minutes) to poll the remote QGenda server for updated information. Must be between 5 and 720 minutes (12 hours). This field is required.
The download and reconcilliation process is run when the adapter starts, and at the poll interval specified. Upon a system failover, the poll is delayed by 10 seconds upon startup.
It is important to balance the speed with which schedule updates are detected, and preventing excessive system load. Only current active assignments are relevant, so the time taken to propagate changes of schedule occuring around the schedule start time to hospital staff is the main consideration in setting this value.
Time Zone Select the time zone system and time zone location to use for processing date and time information retrieved from QGenda. It is assumed that all schedules use the same time zone for their start and end times. This field is required. Report Non-Matching Check this box to indicate whether audit events will be created for tasks which do not match a task mapping. This box is unchecked by default. The Report Non-Matching box can be checked for troubleshooting purposes. -
Complete the Task Mappings configuration fields as
described in the table.
Task Mappings determine the role and location of the created assignment. These in turn are used by the Vocera Assignment Group Sync Adapter to determine the Group mapping, so creating the correct mappings is necessary to make sure the currently on-call specialist gets added to the correct Group and thus enable users to contact them.
It is important to note that if the location or role does not exist when the assignment is created, it will be created by this adapter; a typo may result in extraneous data being created.
The Task Mappings map the Task's External Call System ID to the role and location, using regular expressions and mappings for each. This provides a significant degree of mapping flexibility; any of the required values may be hard coded or can be mapped from the Task ID.
Note that the location and role values are relative to the the assignment being created. At a minimum, the key values for the location and role must be specified.
For a location, the keys are location.location_id and location.facility.name. For a role, the keys are role.name and role.facility.name. It can also be useful to specify other data (especially location.name) in cases where the Location does not exist before the first assignment to it is created.
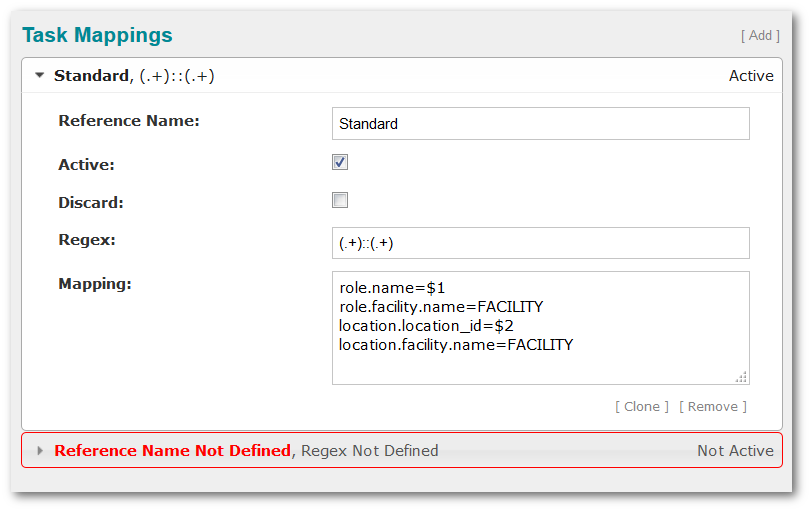
Task Mappings Configuration Field Description Reference Name Enter a descriptive name for this task mapping, which will be used by the adapter in logging and auditing. Active Check this box to enable the task mapping to be used in the implementation. If unchecked, the mapping will not be used. Discard Check this box to indicate whether or not to process this schedule. Task Mappings may be created for the sole purpose of filtering tasks from the audit log. Regex Enter the regular expression to use to match the role and location from the QGenda Task ID, and capture those values. This field is required. Mapping Enter one or more attributes or attribute paths, one per line, to be filled with data from the Regex. In order for an assignment to be properly linked to a role, the role name and role facility name need to be specified. Additionally, in order for an assignment to be properly linked to a location, the location id and the location facility name need to be specified. Note that the location and role values are relative to the the assignment being created. At a minimum, the key values for the location and role must be specified.
For a location, the keys are location.location_id and location.facility.name. For a role, the keys are role.name and role.facility.name. It can also be useful to specify other data (especially location.name) in cases where the Location does not exist before the first assignment to it is created.
Add Task Mappings Select Add to add a mapping to the configuration information. Once multiple mappings exist, drag and drop to reorder their priority. Clone Task Mappings Select Clone to make a duplicate configuration of the selected mapping. The cloned version of the mapping will have a unique reference name and will not be active, by default. Remove Task Mappings Select Remove to remove the mapping from the configuration information.