Description of the settings that enable direct communication between the Vocera Incoming VMI Adapter and the Vocera Platform.
-
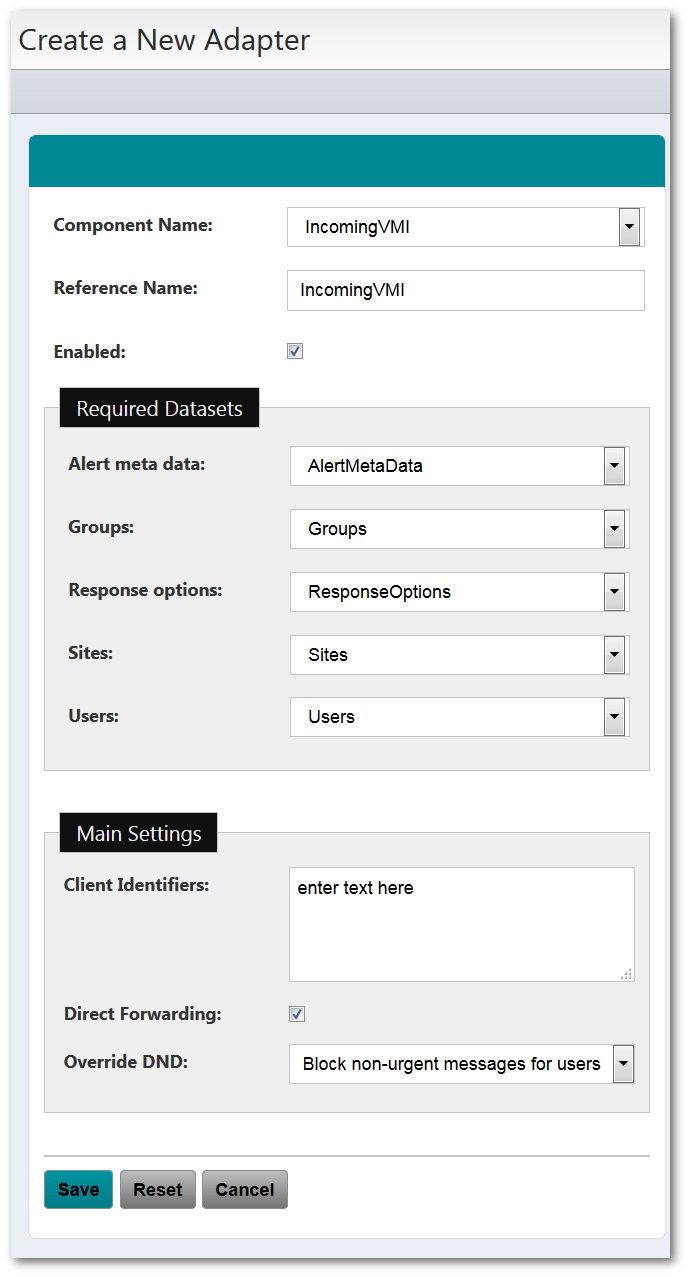
Navigate to the New Adapter option, or navigate to an existing adapter to edit.
See Creating a New Adapter and Editing an Adapter for instruction as needed.
The configuration fields are the same for new and existing adapters.
-
Complete the Main Settings configuration fields as
described in the table.
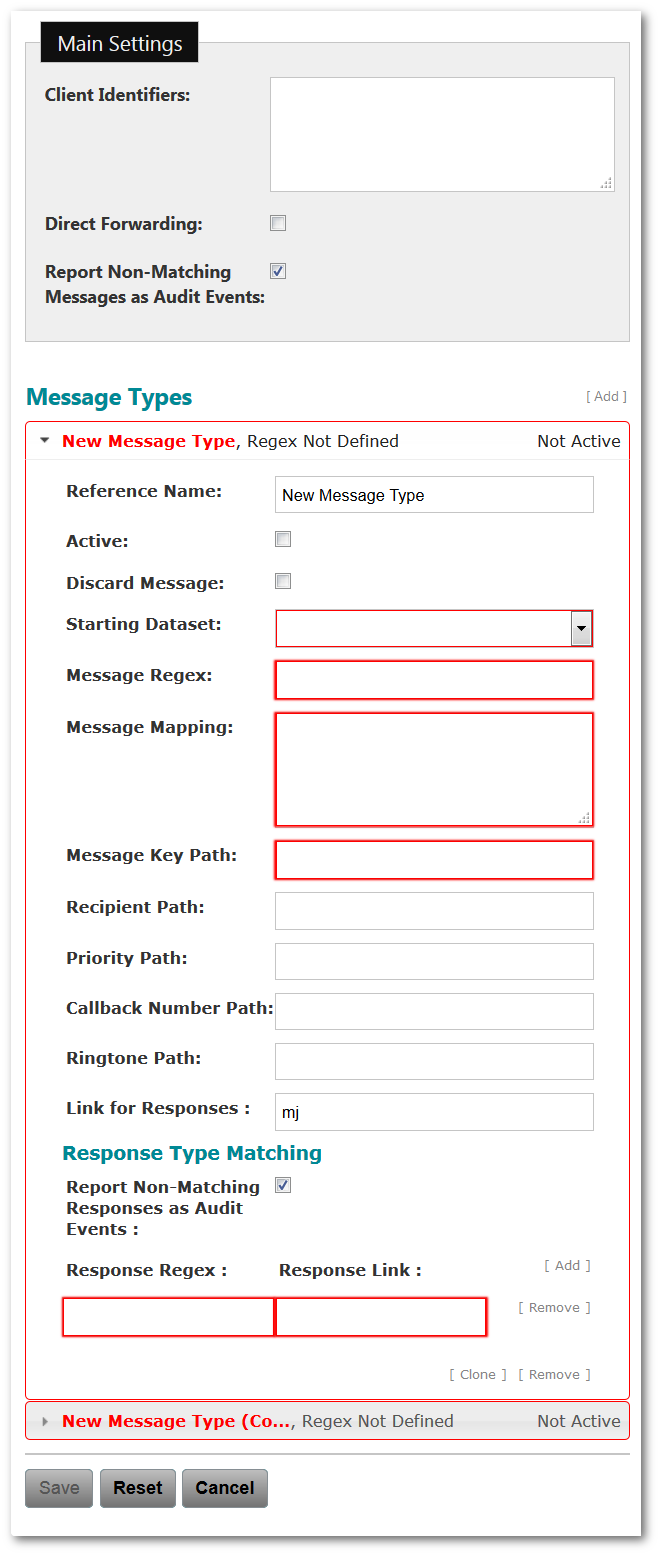
Main Settings Configuration Field Description Client Identifiers Enter a list of client identifiers to be matched for incoming messages. If none are specified, then this configuration will handle any message not handled by another active configuration.
A configuration can have a maximum of 10 client identifiers. Only one configuration can have no client identifier specified.
Client identifiers may contain only the following characters: letter, digit, space, apostrophe, underscore, period, backslash, dash.
Direct Forwarding Select this checkbox to specify that the adapter will forward all messages directly to the Vocera Voice Server.
When selected, the Override DND field displays.
Override DND Select an option in the dropdown list to determine how the adapter will handle messages to users in DND status. Options are:- Do not block messages for users in DND
- Block non-urgent messages for users in DND
- Block all messages for users in DND
This field displays when the Direct Forwarding checkbox is selected.
Report Non-Matching Messages as Audit Events Select this checkbox to specify that an audit event should be recorded for received messages that do not match a message definition.
This field is not available when the adapter is configured for direct forwarding (the above Direct Forwarding checkbox is selected).
There must be at least one Message Type configured. Message Types can be added and cloned. When the configuration contains multiple Message Types, they can be deleted and reordered via drag and drop. The Message Types are part of the exported settings. Message Types are not available when the adapter is configured for direct forwarding.
Message Types Configuration Field Description Reference Name Enter a name to use for the new Message Type, e.g., in audit messages. Active Select this checkbox to use the configured Message Type. Message Types are ignored by the adapter if not active. Discard Message Select this checkbox to discard the message without processing it.
Matched messages are treated (except for auditing) as if they did not match any message type. Discarding Message Types may be created for the purpose of filtering them from the audit log.
Starting Dataset Select the dataset from which all paths/expressions are calculated and into which the message's data should be stored. Not available for discarding message types; otherwise, this field is required. Message Regex Enter a regular expression to capture values from the Message Data of a message recieved from a VMI endpoint, after any decoding.
See Understanding Regular Expressions (Regex) for details.
This is used to determine which Message Type matches the message. Not available for discarding message types; otherwise, this field is required.
Message Mapping Enter one or more attributes or attribute paths to be filled with data from the Message Regex field configuration, specifying how to store its information relative to the starting dataset.
One entry per line. Not available for discarding message types; otherwise, this field is required.
Message Key Path Enter the location into which to store the "global identifier" for the message so that responses and status updates can be sent.
Not available for discarding message types; otherwise, this field is required.
Recipient Path Enter the location into which to store the recipient ID specified in the message. Priority Path Enter the location into which to store the priority specified in the message. Callback Number Path Enter the location into which to store the callback number specified in the message. Ringtone Path Enter the location into which to store the ringtone path specified in the message. Link for Responses Enter the link to the Responses dataset where the matching responses will be stored.
This field is optional. If configured, the following fields will display.
Report Non-Matching Responses as Audit Events Check this box to create an audit log entry when a message contains responses but fails to successfully match one or more of the specified response types.
This field is only available if Link for Responses is specified. Optional.
Response Regex Enter the regex to match a response type.
This field is only available if Link for Responses is specified. Optional.
Response Link Enter the name of the link on the Responses dataset where the response value will be stored.
This field is only available if Link for Responses is specified. Optional.