These settings enable direct communication between the Engage Amtelco Adapter and the Engage Platform.
For additional information related to implementing the Engage Amtelco Adapter, see the following:
To configure the settings described here, select an empty field and begin typing, or select an existing value and type over it. To keep an existing value, do not edit that field.
-
Complete the configuration fields as described in the table.
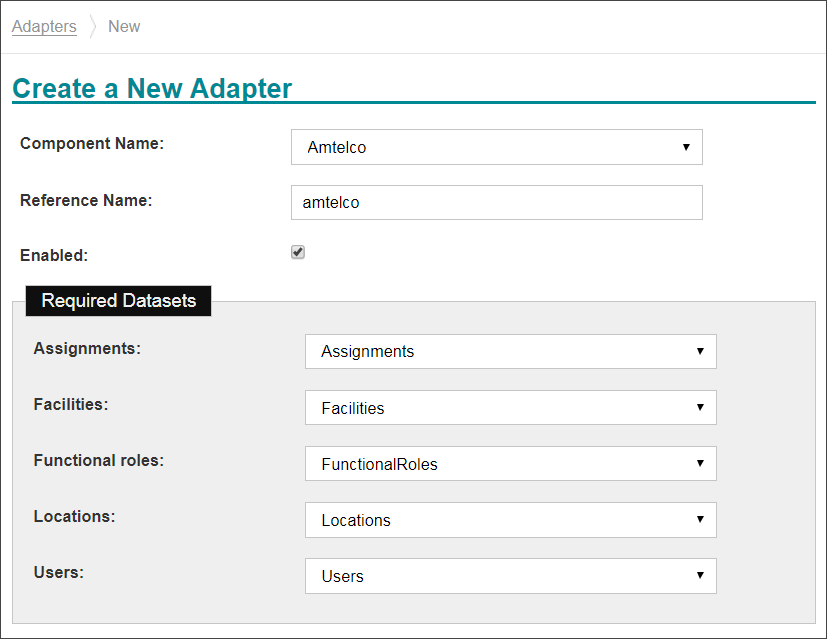
Configuration Field Description Component Name Click the Component Name field to display a list of the systems and devices that the Engage Platform currently supports. Select the name of the adapter to create. Reference Name Enter a short descriptive name in the Reference Name field to uniquely identify an adapter instance. It may demonstrate the adapter function or other information; for example, Production adapter may differentiate a live adapter from a development or "sandbox" adapter. Enabled Select the Enabled checkbox to allow the Engage Platform to use the new adapter. The Engage Platform ignores the adapter if this option is disabled. Required Datasets If more than one dataset exists that meets the adapter's requirements, select the appropriate datasets for the new adapter to function correctly.
The Engage Amtelco Adapter uses the Assignments dataset, including the links to the FunctionalRoles, Locations, and Users datasets. Additionally, the links from the FunctionalRoles and Locations datasets to the Facilities dataset are also required. See Viewing the Engage Amtelco Adapter Requirements for dataset details.
The system searches for the datasets that meet the adapters requirements. If the datasets already exist, the system will use them. If the datasets do not exist, the system will create them automatically.
Select Create in the drop-down menu to create a new dataset to meet the organization's requirements.
-
Complete the Main Settings configuration fields as
described in the table.
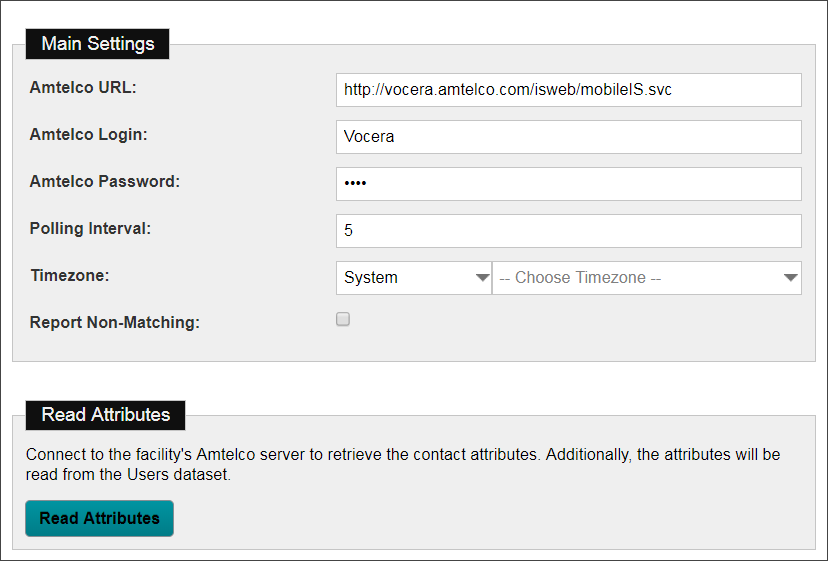
Main Settings Description Amtelco URL Enter the root URL of the Amtelco REST web service. Amtelco Login Enter the username for the Amtelco API login credential. Amtelco Password Enter the password for the Amtelco API login credential. Polling Interval Enter (in minutes) how frequently to request the shift schedule from Amtelco. Timezone Select the timezone used to interpret the times from the Amtelco server.
If a timezone other than System is selected, further definition is required in the second droplist for the chosen timezone. For example, choose the Artic timezone, and then select Longyearbyen in the second droplist.
Report Non-Matching Check this box if an audit should be recorded for received messages that do not match a schedule mapping.
Read Attributes Click Read Attributes to connect to the facility's Amtelco server to retrieve the contact attributes. Additionally, the attributes will be read from the Users dataset. The currently entered Amtelco URL address, login, and password will be used to retrive attributes.
-
Complete the Contact Mappings configuration fields as
described in the table.
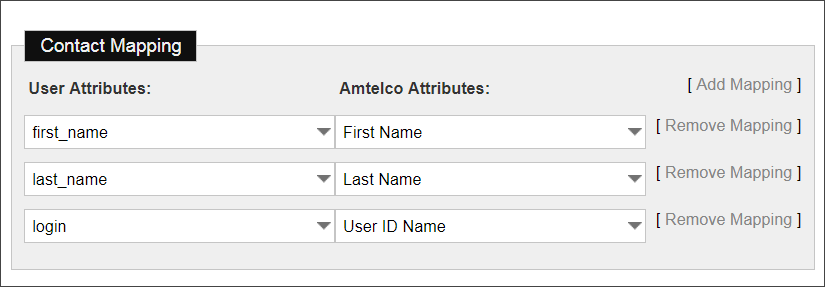
Contact Mappings are Regex mappings used for matching Amtelco Contact names to Engage Amtelco Adapter Users.
Contact Mappings Description User Attribute Select additional User attributes to map Amtelco contact information. Amtelco Attribute Select the Amtelco attribute to map to a User attribute. Add Contact Mappings Select Add to create additional contact mappings.
Remove Contact Mappings If one or more contact mapping is created, the ability to remove a mapping becomes active. Select Remove to delete the mapping from the adapter configuration.
-
Complete the Schedule Mappings configuration fields as
described in the table.
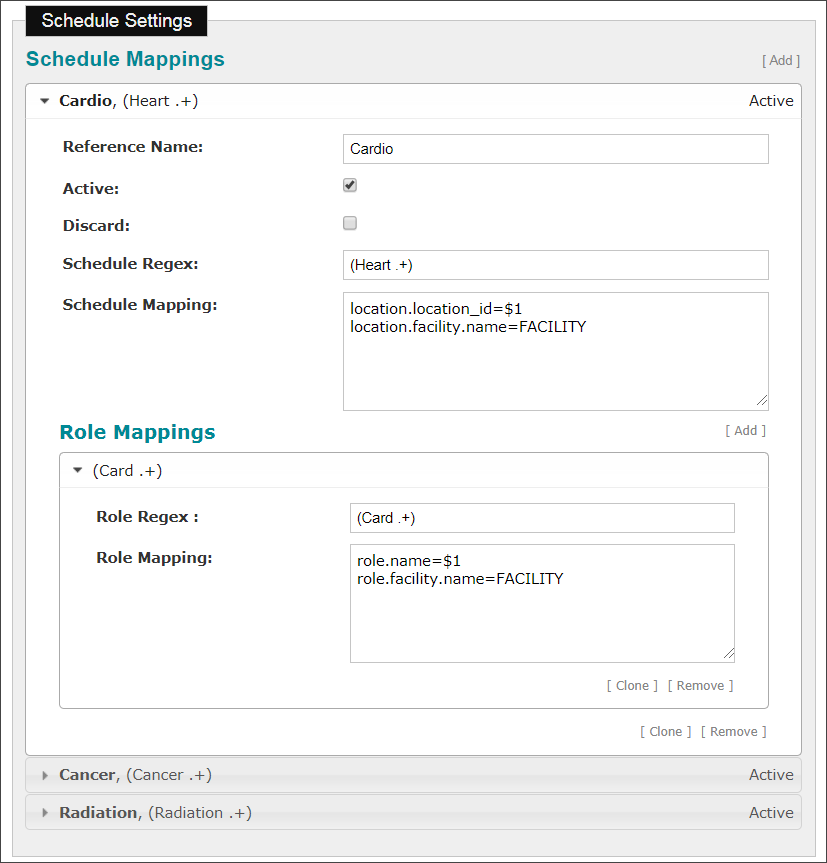
Schedule Mappings Description Reference Name Enter a unique name to be used by the adapter to refer to this schedule mapping. Active Check this box if the Schedule Mapping should be evaluated. Discard Check this box if the schedule mapping should not be processed. Schedule Mappings may be created for the sole purpose of filtering them from the audit log. Schedule Regex Enter a regex to match a schedule name to a location and capture values from it. See Understanding Regular Expressions for details on using regex. Schedule Mapping Enter the mapping from the Schedule Regex to an Engage Platform Location.